Manually control the build process
To manually control the build process, either:
- Wait for the tree to stop growing
-
Use the Pause button to stop the automatic process while it is still growing
.png)
-
Use the Create Root Node button to start a new tree, just creating the first node.
.png)
Before growing the tree further, you can:
- Update the Dimensions. See How do I configure the dimensions?
- Update the Stopping Conditions. See How do I set the Stopping Conditions?
- Update the Algorithm Options. See How do I set the Algorithm Options?
- Update the Marketing Costs. See How do I set the Marketing Costs?
You can then use the manual control options to take full control of how the tree is built. You can:
- Choose the dimension and node to split
- Choose which split creation method to use for an individual split (i.e. PWE or Chaid)
- Manually define how categories are grouped together to form branches.
Alternatively, you can continue to use the automatic build process but exert some influence, for example, determining which nodes are grown. See How do I influence the automatic build process? for more details.
For suggestions on how to use these options see Suggestions for influencing the build process.
The information in the Next Splits panel is updated as you make changes to the Dimension Conditions*and the Algorithm Options. For more information see When are the Next Splits updated?.
Note that you cannot modify the base or analysis selections without rebuilding the tree. Also you cannot modify a tree which has been saved and then restored.
Choose the dimension and node to split
To split a particular node, you can either right click on the node you want to split in any of the Tree Views and use the pop-up menu to choose the dimension, or you can work from the Next Split panel once you have set the focus node to be the node you want to split.
To select a node from one of the Tree Views simply right click the node:
- Splits that are valid according to the Split Validation Options are listed together under "Use Valid Split". These are presented in their rank order, with the best split first.
- Splits that are invalid are listed under "Force Invalid Split".
-
Splits that have been marked not to use on the Dimensions Tab are listed under "Use Excluded Split".
.png)
To select which dimension to use from the Next Split panel, simply right click on the row corresponding to the dimension. Note you must click on the top level row of the drill down table (this is the row giving a summary at the dimension level, rather than listing the individual categories). A pop-up menu will appear with one of the following options, depending on the status of the split:
-
Use Valid Split: for splits passing the Split Validation Conditions
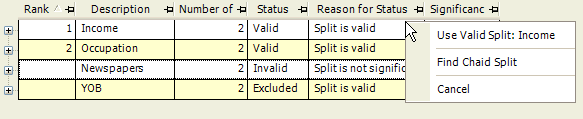
-
Force Invalid Split: for splits failing the Split Validation Conditions
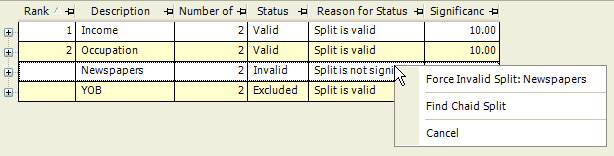
-
Use Excluded Split: for splits marked not to use on the Dimensions Tab
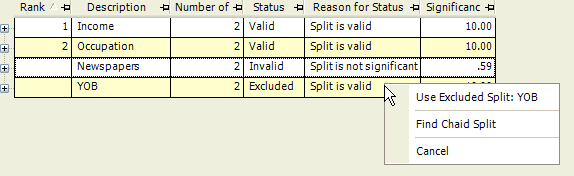
Choose which split creation method to use for an individual split
By default all splits created automatically use the "Default Split Creation Method" in the Algorithm Options. You can change the method used for an individual split by right clicking on the split within the Next Splits panel.
-
Once you have specified the method for a particular split, the How Created column is displayed in bold, to show that you are no longer using the default method.
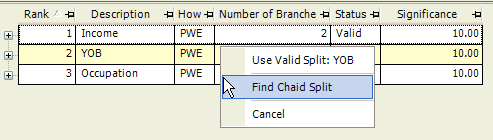

-
Now if you change the default method to be CHAID, the splits which are following the default method (those not in bold) are also updated to use CHAID.
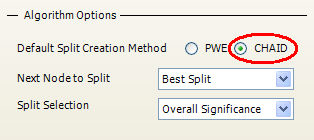

-
If you change the default method back to PWE, only those splits which are following the default method (those not in bold) are updated to use PWE
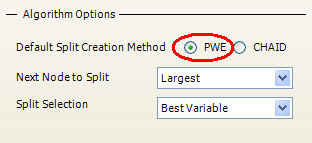
-
To make a split follow the default method again, you must right click on the split and select "Reset to Default Split". The split will then use whatever method is set to be default in the Algorithm Options.
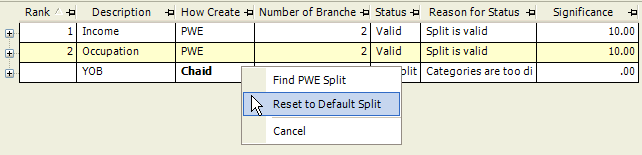

A similar set of options is available by right clicking on a node. These options affect all the splits within the node.
Manually defining how categories are grouped to form branches
The automatically generated splits can be reviewed in the Next Split panel. You may decide that you want to change the way categories are grouped, for example, to fit in with business logic.
To create your own branches, just highlight a group of categories and right click and select:
-
"Define Branch": to create an additional branch out of the categories highlighted. In this case a third branch is created and the How Created column is set to Manual.
.png)
.png)
-
"Define Binary Split": Creates a two way split with the categories highlighted in one branch and all other categories in the other.
.png)
.png)
In both cases the split is created but will not be used to create child nodes until either you specify for this to be done, or it is chosen automatically if it is the best split.
Redefining branches of a used split
You can define branches for any dimension on any node. However, if the node has already been split, then the tree will have to be pruned at that node before this can be done.
You will be prompted before this is carried out:
.png)
Defining branches for a flag array variable
Flag Array branches can only be based on a single category. For example, a split might create 2 nodes, one with people whose Newspapers include The Times, and the other with people who could read any of a variety of Newspapers so long as this does non include The Times.
You will therefore be prevented from selecting more than one Flag Array category.