Linked systems
When building a FastStats system it is possible to divide the system into two or more parts. This is achieved by building a standalone 'core' or system in the usual way. A linked system can then be defined where the Master table in the linked system is a table defined and built in the core.
As an example using the Holidays data set a core system could be built containing just the two tables Households and Individuals. This system can then be connected to and queried using FastStats in the usual way.
A linked system could then be defined that adds the Brochures and Holidays tables to the core system. This system requires the core system to be present for users to connect to the linked system.
Core and Linked systems are particularly useful if you want to build a number of systems that have a common data set. For the Holidays data set you could build the core system once and then multiple users could each have their own linked system with different sets of Bookings and Brochures to analyze. The disk space required for this scenario would be substantially less than having a complete separate system for each distinct data set.
To create a linked system, first ensure that you have a suitable data model and that you have a built system to connect to.
Create a Core System
The core system must have a 'link key' defined on the variable that will be used in the join to the linked system. You can add multiple link keys to a system. To add a link key navigate to the table relationships diagram and right-click on the field that you wish to generate a link key for.
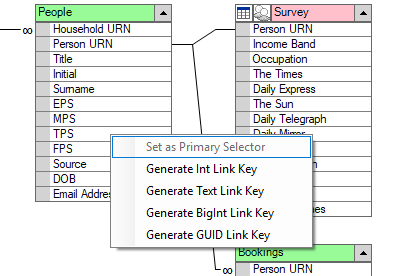
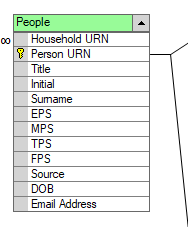
You can choose the type of link key you wish to generate. A key icon will indicate that a link key will be generated:
Create a Linked System
- Create a new system
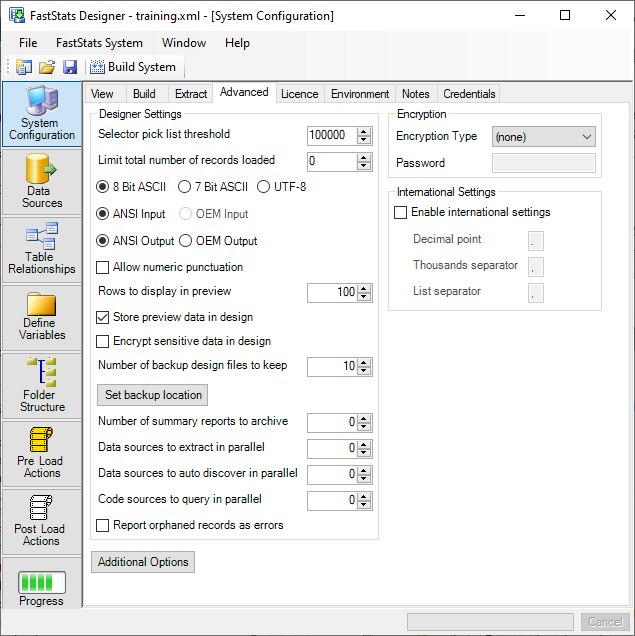
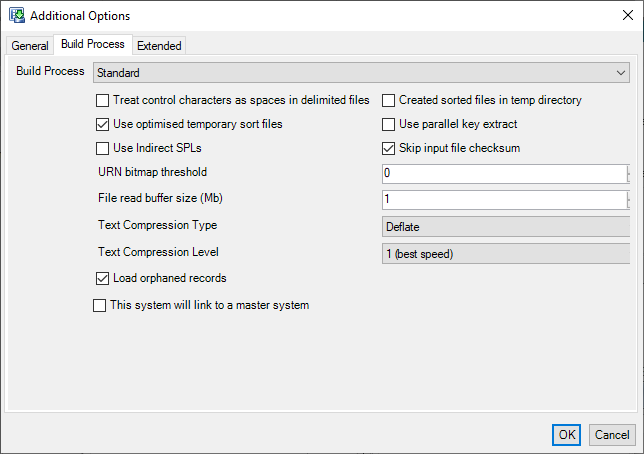
- On the Advanced tab of the system configuration, check the boxes The system will link to a master system
- Add your linked data sources
- On the table relationships diagram go to the Table Relationships menu and choose Linked System Properties...
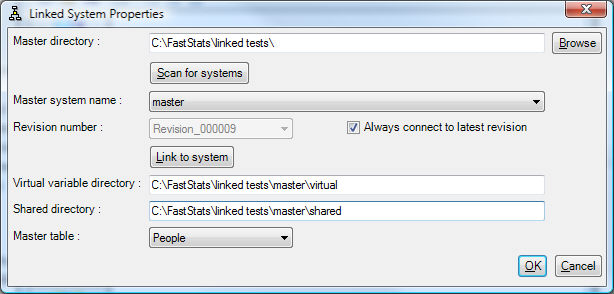
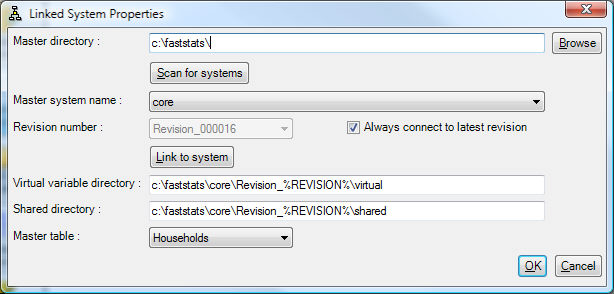
- The master directory is the directory where the built core system exists
- Click Scan for systems
- The core system name should appear under Master system name
- Click Link to system - there may be a pause as Designer connects to the core system
- Choose the linked master table and click OK
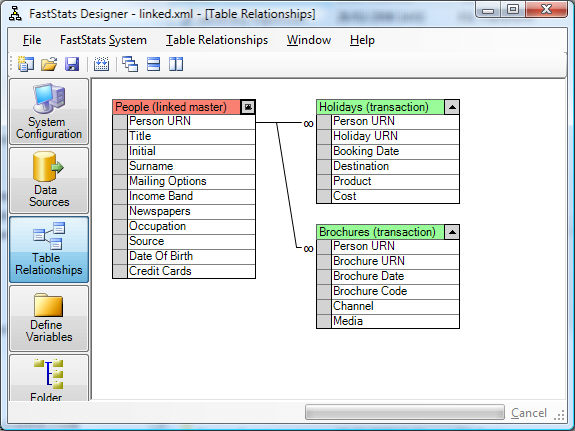
- Drag the relationships between your linked master table and your transaction/join tables:
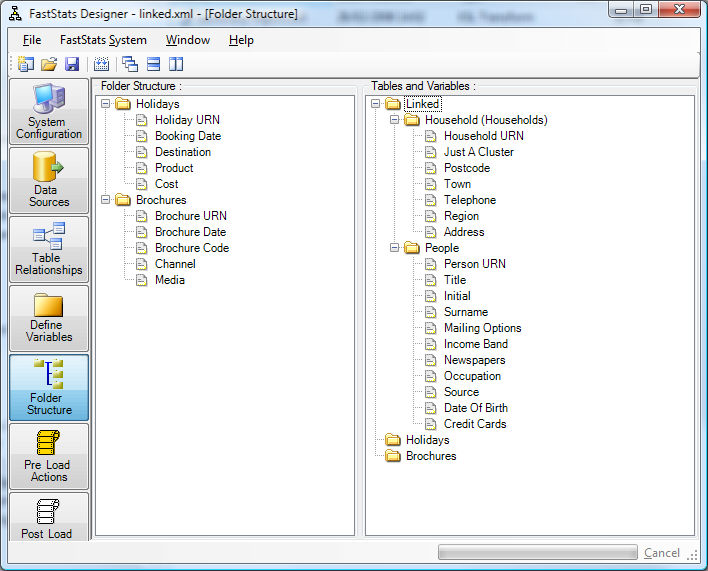
- Linked systems have their own folder structure that is independent from the core system
- To create a valid folder structure you have to include the variables from the core system in the linked systems folder structure, do this by dragging the folders/variables in usual way
- You can then build the linked system
- To connect to a linked system the core system must also be available, so a linked system deployment must include the core system
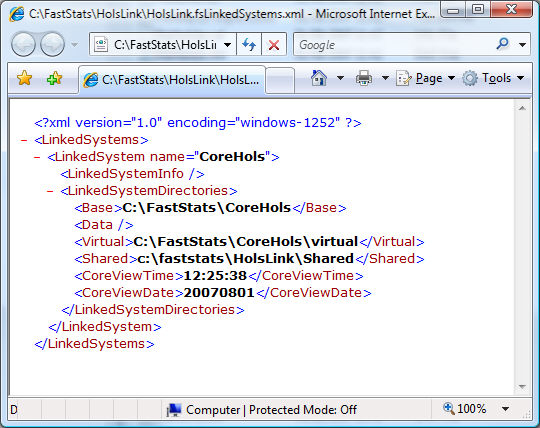
- The linked system contains a file called systemname.fsLinkedSystems.xml that specifies the location of the core system - this file will need to be modified if the location of the core system changes:
- This modification can be done automatically by using the Modify Linked System Xml post-load action
Linked system deployment
The post-load action Modify Linked System Xml can be used to alter the Base tag in the above Xml before deployment takes place. This is needed if the location of the core system is in different locations on the build machine and the production machine. By modifying the path using this action you can ensure that the deployed system refers to the correct location on the production machine.
Revision tracking
If the core system a linked system connects to is rebuilt then the linked system will be unable to connect to it since the link relationship between the two systems has been broken. This can be fixed by rebuilding the linked systems linking to the new core system. This can be a problem if there are a large number of linked systems since they will all have to be rebuilt. To alleviate this problem core systems can be used and FastStats has a revision/version tracking system to help manage this scenario.
When building a core system you can enable Revision tracking and then specify a revision number. The revision number will auto-increment on each successful build. The revision number will be substituted into a built-in environmental %REVISION% that should also be specified in the base/temp and extract directories:
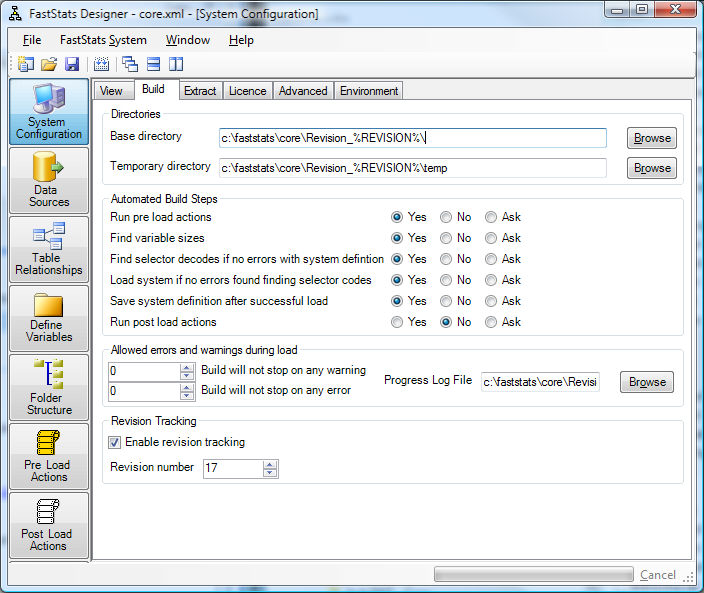
In the screen above the next core build will be in C:\FastStats\core\Revision\_000016\
To connect the linked system to this versioned core system you must specify the parent directory of where the core builds are, you can then choose to always connect to the latest revision or to build from a specific revision number. Notice the %REVISION% environment variable is also used to specify the virtual variable and the shared directory locations: