Logging in
To log into Apteco FastStats, start up the application by clicking on the shortcut icon  on your desktop, or navigate via your Windows Start menu.
The application's loading screen will display as FastStats loads into memory and then the login screen will appear. Depending on how you are running FastStats, you will see a slightly different login screen.
If you see the following screen with an Enterprise tab, then you are logging in remotely:
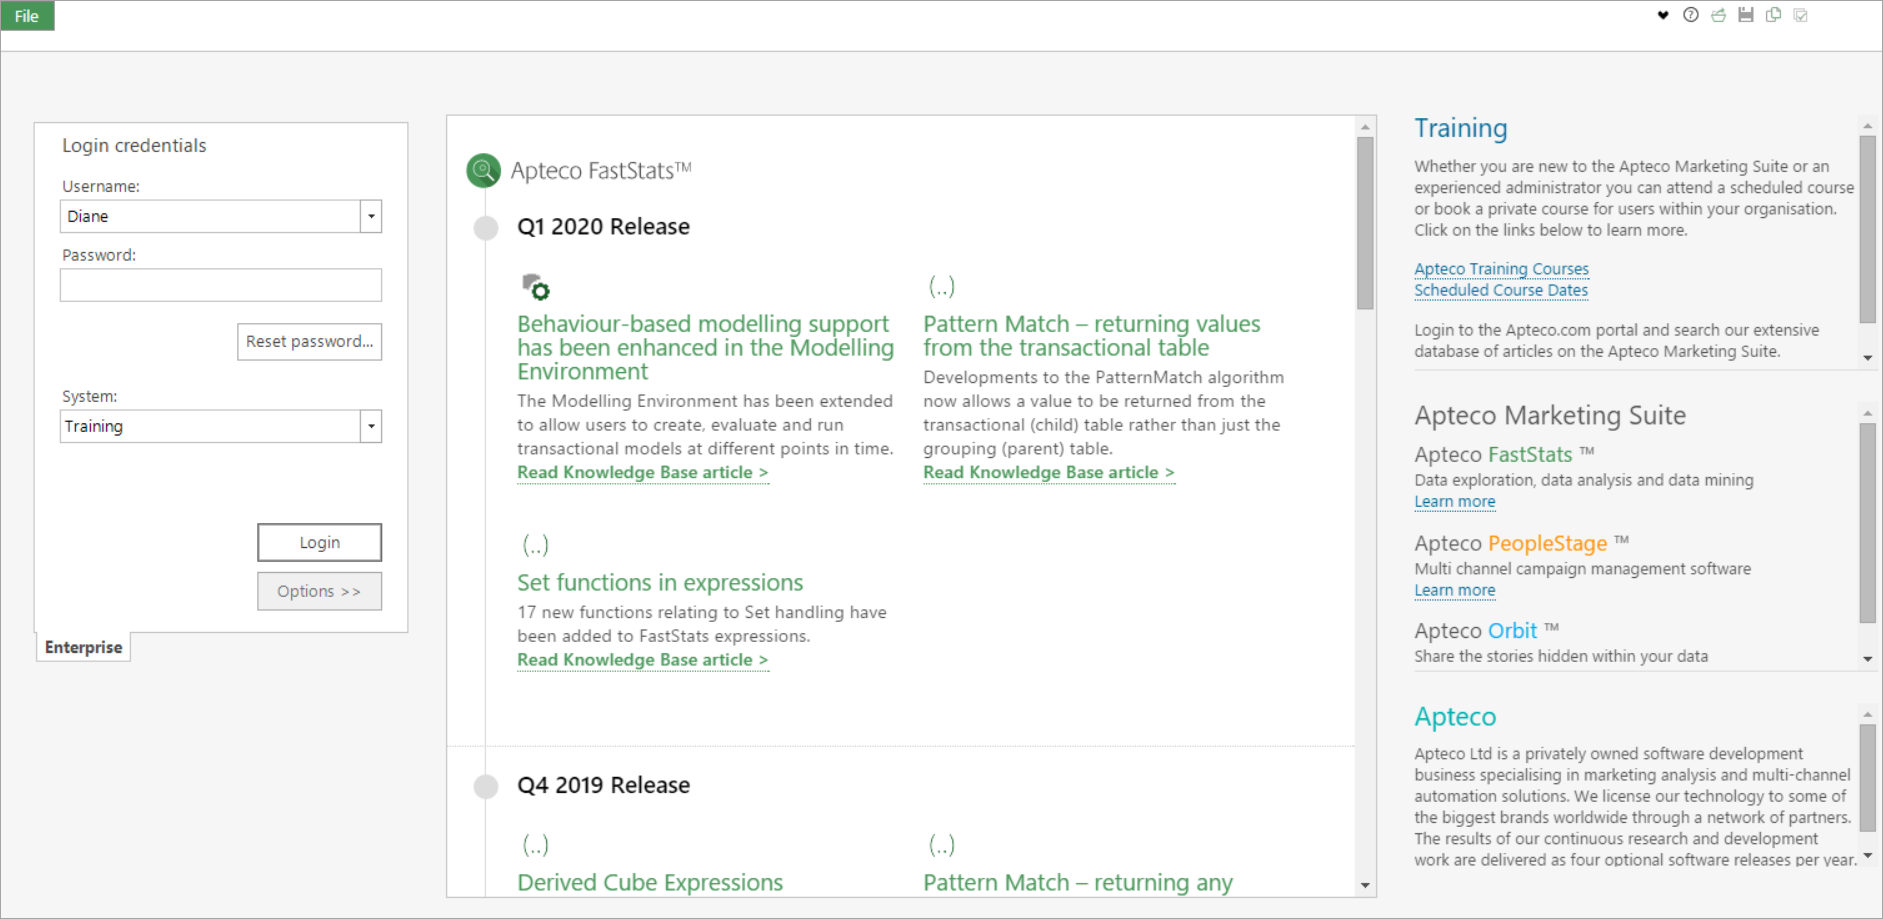
If you see the above screen with just a Local tab, then you are logging in locally or, in some cases, both the Local and Enterprise tabs will be present meaning that you can log in either remotely or locally.
Logging in to a local FastStats system
To log in to a local FastStats system you need to have a system (probably built with FastStats Designer) on the computer that you are running FastStats on.
You will also need to have a server connection file. This might have been created by the person that built your system (as part of the Designer build process), or you might have to create your own before you log in.
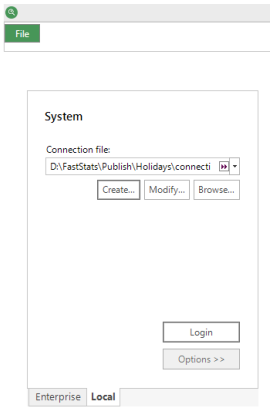
I have a server connection file to use
If you have logged in to FastStats before using an existing connection file, then press the down arrow next to the Connection File text box and this will show the last 5 connection files used. If the file you want to use is present, then select it and press the Login button.
If the correct connection file is not in the list, or if you have not logged into FastStats using the connection file before, press the Browse... button. This will show a file chooser. From here you can navigate to the appropriate file and press the Open button. When the file chooser closes, you will see that the connection file name has been put in the text box. You can then press the Login button to log in. The next time you want to use this connection file, it should appear in the list as mentioned above.
I don't have a server connection file
If you don't have a server connection file, but have a local FastStats system, you can create a connection file using FastStats. Press the Create button and a window will be displayed with all the options required to create a connection file.
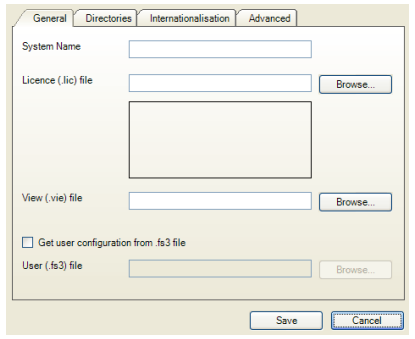
Enter the name of the system (as chosen when the system was built) in the first text box. Then choose a FastStats licence file by either typing in the path or pressing the Browse... button and using the file chooser. When the licence file has been chosen, its details will appear in the label below the licence file text box.
Then choose the View file (also known as the ".vie" file) in the same manner as the licence file. The view file must be in the FastStats system's base directory. If you have a user configuration file (also known as the ".fs3" file) then tick the Get user configuration from .fs3 file tick box and choose the user file.
If you don't have a user configuration (".fs3") file, or you don't want to use it, make sure that the tick box mentioned above is not ticked and enter the appropriate details in the Directories and Internationalisation tabs. Only change settings in the Advanced tab if you are absolutely sure that this is required.
Logging in to an enterprise FastStats system
To log in to a remote FastStats system, the system must have been correctly configured to run using the FastStats.Net server side architecture.
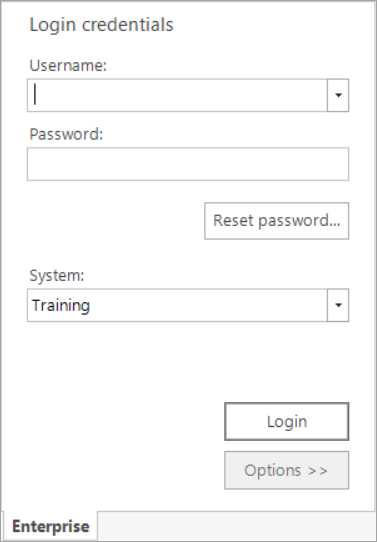
You will have been provided with a version of FastStats that is configured to connect to the FastStats system over the network. You may have a choice of systems that you can log into. You can select which one you would like by choosing from the drop down list labelled System (to choose, press the down arrow to the right of the text box). If the System list-box is empty, you will be able to type in the name of your system.
You will then need to enter a username and password to log into the system. These will have been provided by your FastStats Administrator.
Once this information has been entered, press the Login button.
If the Options >> button is not disabled, you will also be able to change which FastStats WebService you can connect to. This information is provided by your FastStats Administrator. If you are unsure as to what this means, please do not edit this setting and seek support.
One-time passcodes
FastStats supports one-time passcodes (OTP) as a second authentication factor. See Multi-factor authentication for setup instructions, recovery codes, and administrator options.