Salesforce data source configuration
This is a reference guide for system administrators to set up and configure your Salesforce data for access by Orbit Connect.
Note
For end-user documentation in Orbit Connect, see Salesforce data source.
Warning
As of the Spring '26 Salesforce release, you can no longer create new Connected Apps. Salesforce has introduced External Client Apps (ECAs) as the replacement, offering improved security and packaging. This guide covers the ECA setup process.
Existing Connected Apps are not affected—they continue to work and can still be edited, installed, and deleted. However, Salesforce intends to move toward full end of support for Connected Apps in future releases and recommends starting to transition now.
If you need to migrate an existing Connected App, see Migrating an existing Connected App.
Prerequisites
Administrator access within your Salesforce organisation.
Finding your domain URL
To find your domain URL:
-
Click the cog icon in the top-right corner, then click Service Setup.
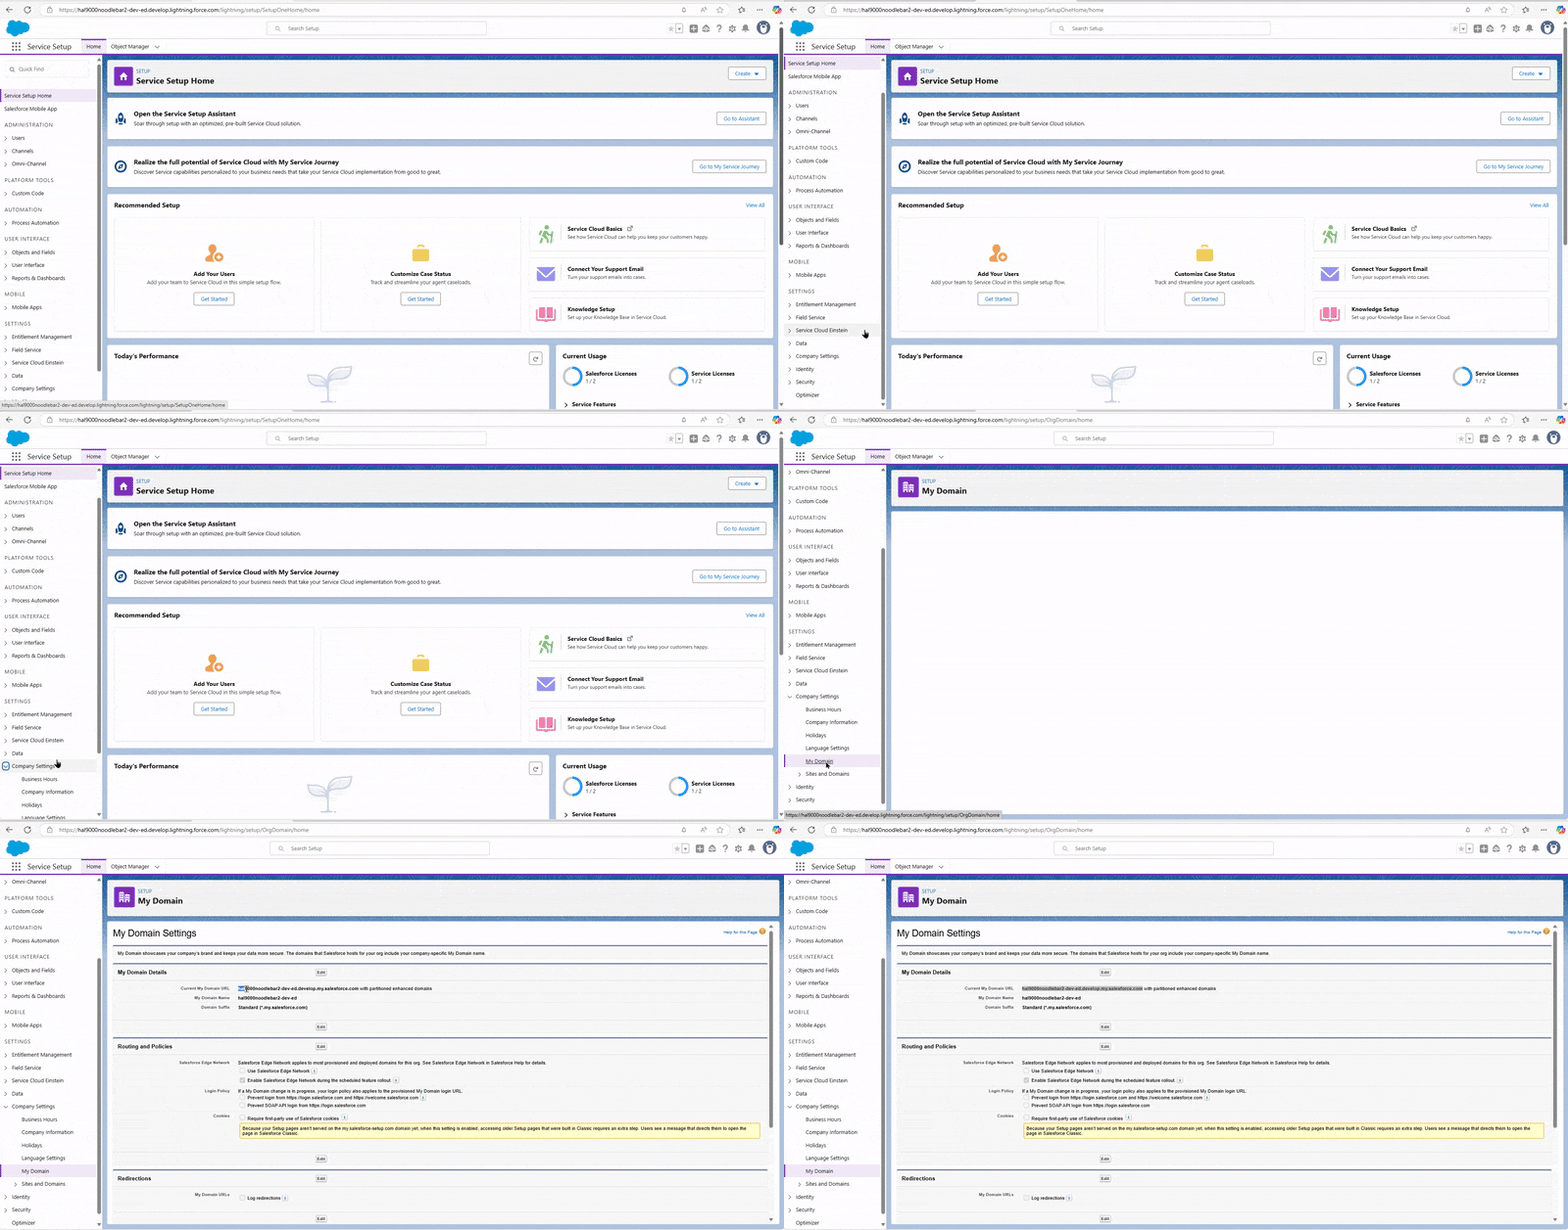
Your domain URL is displayed on the My Domain page. Always prefix it with https://, for example: https://yourdomainname.my.salesforce.com
Checking for an existing external client app
To check whether an ECA already exists:
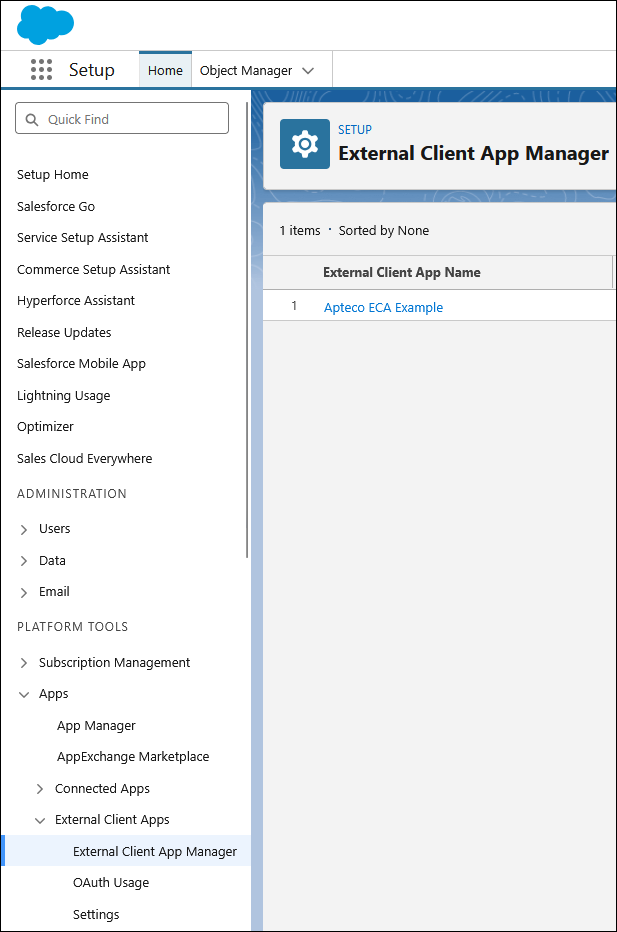
- Click the cog icon in the top-right corner, then click Setup.
-
Navigate to Platform Tools > Apps > External Client Apps > External Client App Manager.
-
Review the list of apps:
- If an ECA is present, go to Retrieving your Consumer Key and Consumer Secret below.
- If no ECA is present, go to Creating an external client app below.
Creating an external client app
Create the app
To create a new External Client App:
- Navigate to Platform Tools > Apps > App Manager.
- Click New External Client App.
-
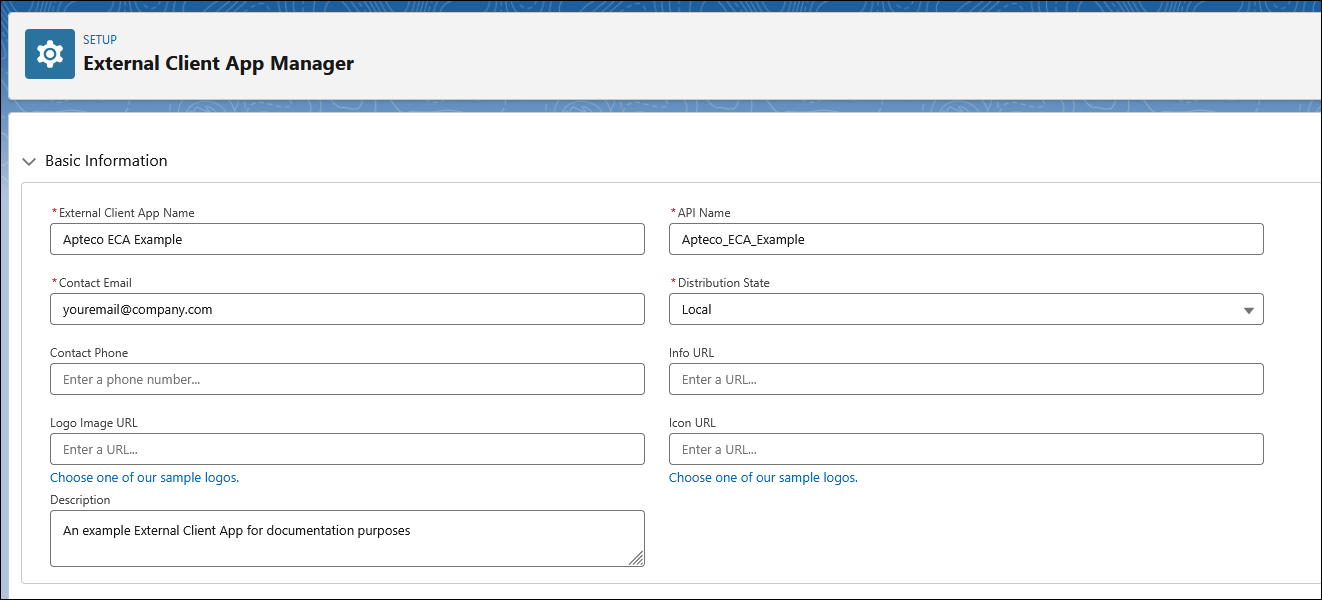
Complete the following fields:
- External Client App Name
- API Name—populated automatically from the app name
- Contact Email
- Distribution State—leave as Local
-
Click Create.
- Enter a callback URL. Salesforce recommends
https://openidconnect.herokuapp.com/callback. - Add the following OAuth scopes:
- Manage user data via APIs (
api) - Manage user data via web browsers (
web) - Access unique user identifiers (
openid)
- Manage user data via APIs (
Enable client credentials flow
-
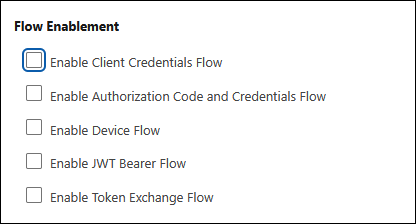
In the Flow Enablement section, tick Enable Client Credentials Flow.
-
Click OK.
- In the Security section:
- Deselect Require Proof Key for Code Exchange (PKCE) extension for Supported Authorisation Flows.
- Confirm Require Secret for the Web Server Flow and Require Secret for Refresh Token Flow are selected.
- Click Save.
Configure OAuth policies
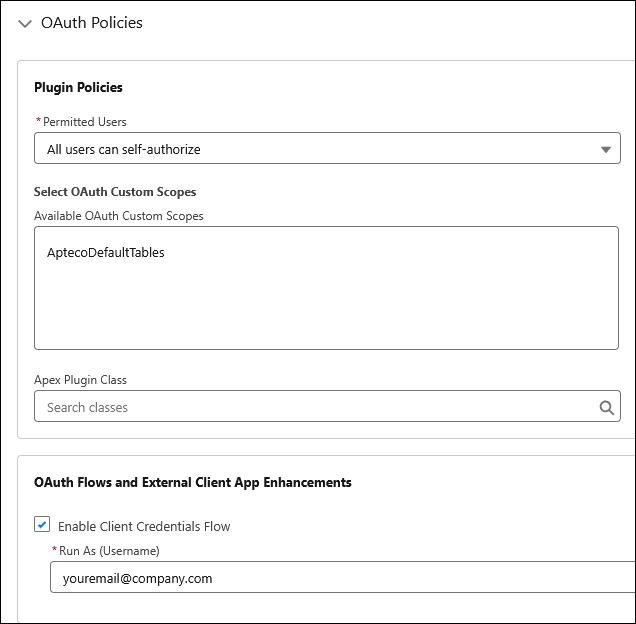
- Go to the Policies tab and select Edit.
- Expand OAuth Policies.
-
In the OAuth Flows and External Client App Enhancements sub-section:
- Tick Enable Client Credentials Flow.
- Enter the email address of the user whose access permissions the app will inherit.
-
Click Save.
Retrieving your consumer key and consumer secret
- Complete the identity verification steps.
-
Use the Copy buttons to copy your Consumer Key and Consumer Secret.
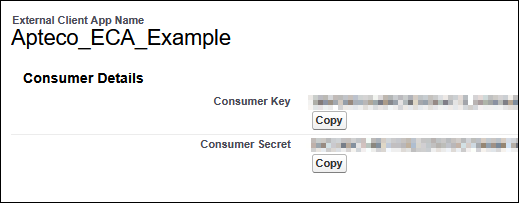
You've now successfully set up and configured Salesforce as a data source. For more information on using it, see the Salesforce data source user documentation.
Migrating an existing connected app
If you need to migrate an existing Connected App to an External Client App, follow the Salesforce migration documentation.