Creating a confirmation page
The next step in setting up your form process is to create a confirmation page.
To create a new confirmation page template:
-
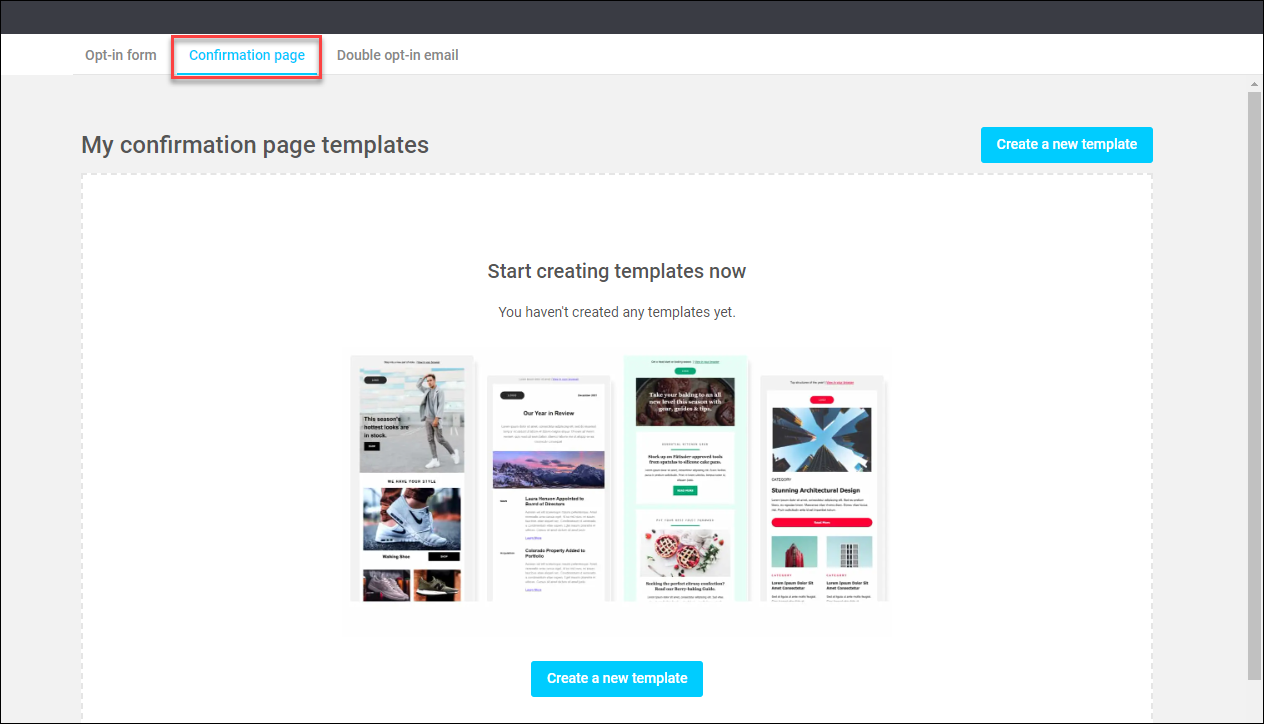
In the Form Builder, click Confirmation page.
-
Click Create a new template.
- You can now choose to use a template from the gallery, or use one of your own. To create a brand-new template, click Using a template from gallery, then click Select under the template you want to use.
-
Choose a name for your new template, then click Use this template.
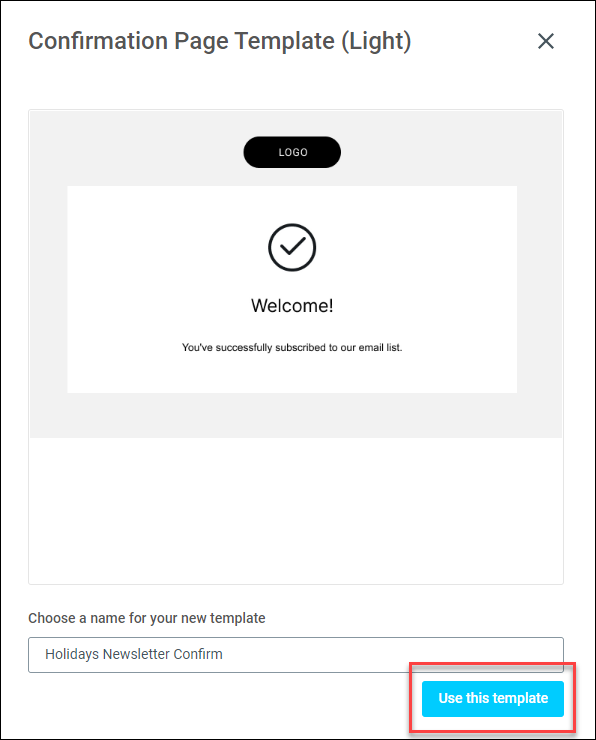
You now have a new confirmation page template that you can customise for your needs.
Note
You can preview your page at any time by clicking Preview at the top of the form builder.
When you’re finished editing your template, click Save & Publish to gallery.
Editing your confirmation page template
You can customise your confirmation page in much the same way you edited your opt-in form. The layout tools and content tools allow you to edit columns, text, images, etc.
Adding your company logo
You can add your company logo in the same way you added images to the opt-in form and also include a hyperlink to your website.
To upload an image of your logo to your image gallery:
-
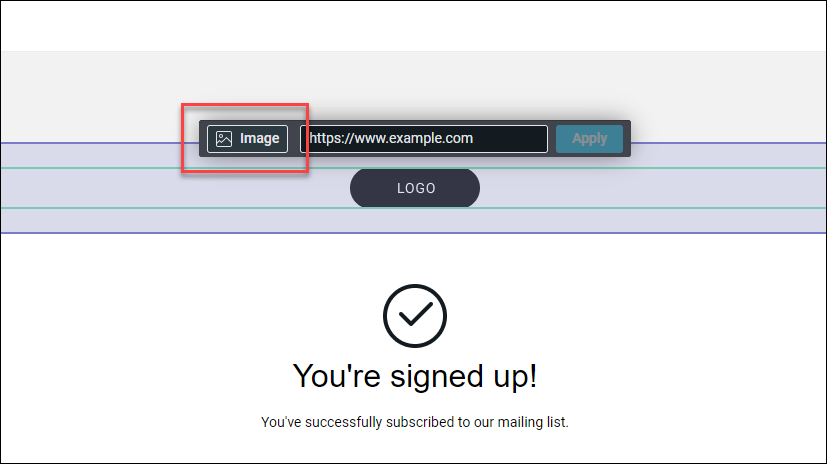
Click on the element you want to add your logo to, then click Image.
-
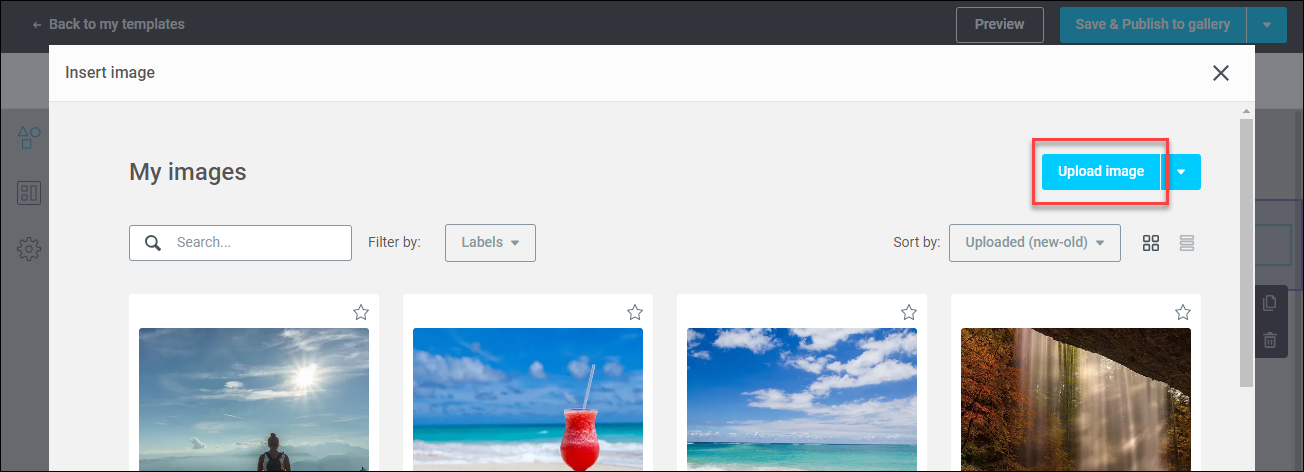
If there is already a placeholder image, click Replace. This opens up your image gallery.
-
Click Upload image.
-
Select the image file you want to use.
You can use the Image Tool Editor to crop, resize, rotate, or flip your image.
-
Add a hyperlink in the Image link box.
- Click Save.
You’ve now added your logo to the confirmation page.