Point to point wizard
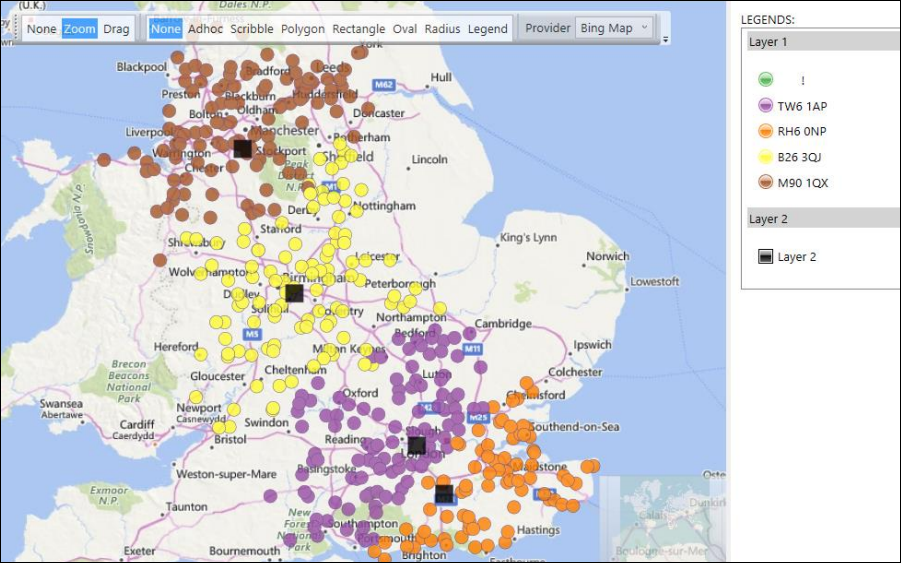
The Point to Point wizard calculates distance between a selection of records and a specified centre point(s) - for example you may wish to target customers based on the distance to their nearest retail outlet, event location, or airport. The output of the wizard is a virtual variable. You can calculate:
- Drive time
- Drive distance
- Straight line, 'as the crow flies' distance
- Walking time
This wizard can work in two ways:
- Using a geographic variable
- Using latitude and longitude variables marked with the GeoFormat property
If your system does not have latitude and longitude and you are using geographic variables, this wizard performs best when dealing with either a small number of records, or a coarse-grained geographic variable. If results need to be calculated for a large number of records with a fine-grained geographic variable, you should consider using the Drive Zone wizard instead. See the Selection step for more details on this.
-
In systems with latitude and longitude variables, use of the Bing API isochrone allows for more time-efficient processing of larger volumes of records, with the ability to specify a level of drivetime accuracy.
For the simplest case, you must specify the maximum drivetime (for example 0-80 minutes) and accuracy (for example to within 5 minutes) and the resulting variable will be a numeric with values of 5, 10, ..., 75, 80 - or a missing value if further away than 80 minutes.
-
The option to specify a walking time calculation is available and useful if you have latitude and longitude variables set up.
Warning
Billable transactions for Bing Maps apply - see Update variable and Bing API for more detail.
To get started, from the Wizards ribbon bar:
-
Click and select the
 Point to Point link to start the wizard at the Selection step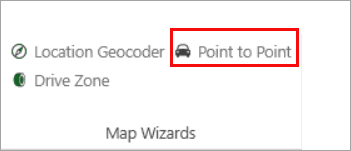
Selection
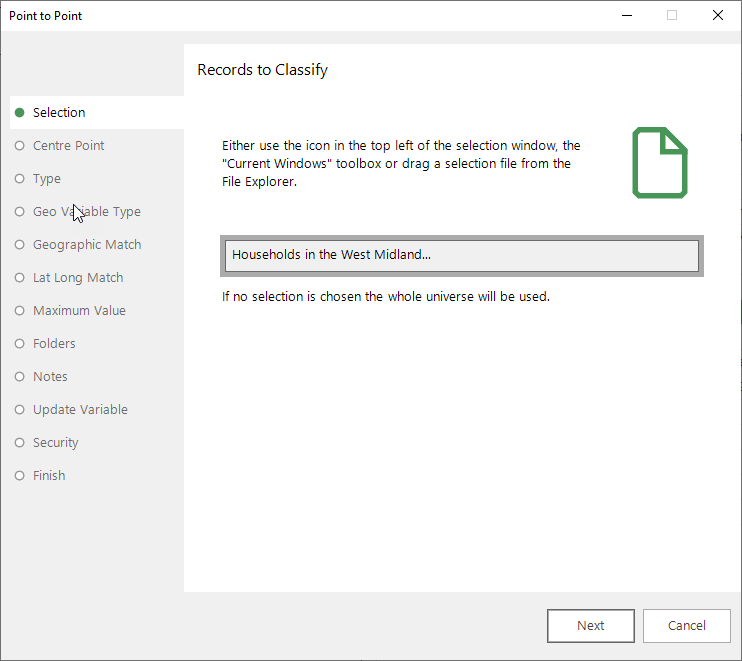
The first step of the wizard asks you to provide a selection of records.
These records can be grouped by:
- a geographic variable you specify later in the wizard - for example Postal Sector, Postal District, Postal Area
Or, if available:
- latitude and longitude co-ordinates
Based on the variable type you subsequently choose, each group will have a drive time, drive distance, straight line distance or walking time calculated for it.
When working with a geographic variable
If the selection and geographic variable chosen will create a lot of groupings, the wizard will take a long time to process the results.
For example:
- If you add no selection, the wizard defaults to using the whole FastStats database (containing data on UK addresses)
- If you then select Postal Sector as your geographic variable, the number of different groupings of postcode sectors in the data could be as much as the total number of postcode sectors in the UK (approximately 12,000)
The wizard then has to calculate the distance or drive time from each postcode sector to the centre point; this will take a very long time!
Alternatively, if the selection specified is just of one particular town, a lot fewer postal sectors will be chosen (i.e. in the Holidays example database, there are about 20 postal sectors in Warwick) and, therefore, the wizard can process these quickly.
Another approach would be to select all records in the system, but to use a more coarse-grained geographic variable such as Postal Area (of which there are approximately 120 in the UK). In this case, the wizard will also be able to proceed quickly.
When working with a geographic variable
If a large number of records do need to be processed using a fine-grained geographic variable (such as Postal Sector), the Drive Zone Wizard could be used to place each record into a particular zone (such as between 30 minutes and an hour from the centre point). Because the records are grouped into zones rather than figures calculated for each record, the wizard is a lot faster.
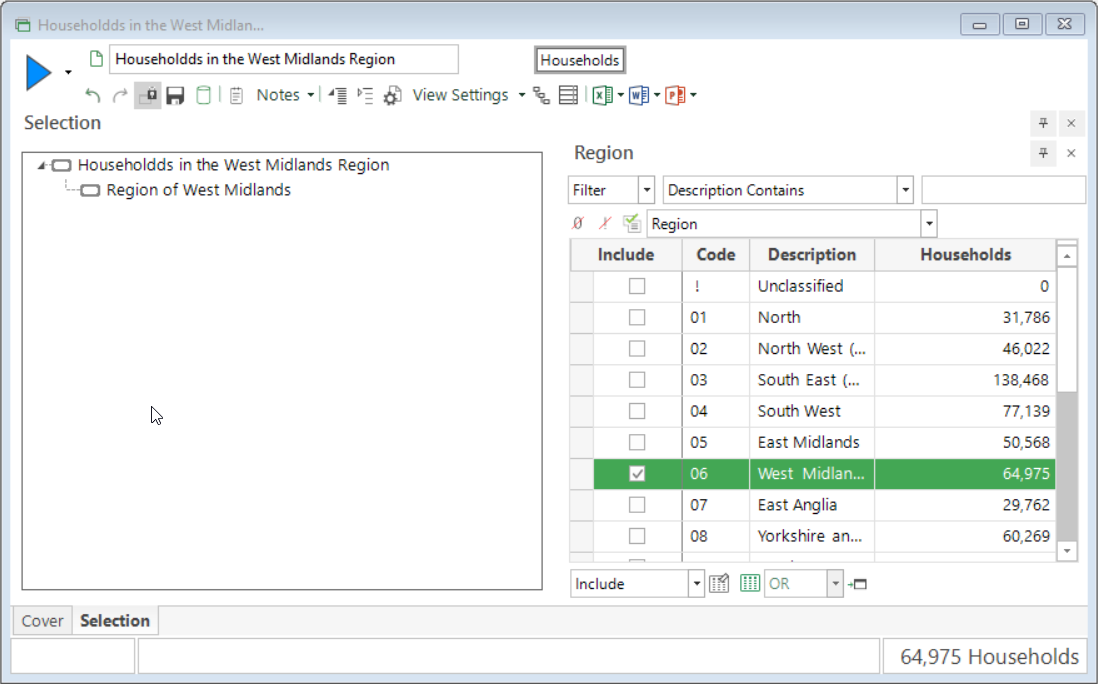
The following example uses a selection that identifies Households in the West Midlands Region as the Records to Classify.
To get started:
-
Create a Household level selection using the Region variable and select West Midlands
-
Drag the selection onto the Drop your selection here drop-box
Settings
This is where you define the map settings to use when calculating the drive time, drive distance, straight line - 'as the crow flies' - distance, or walking time.
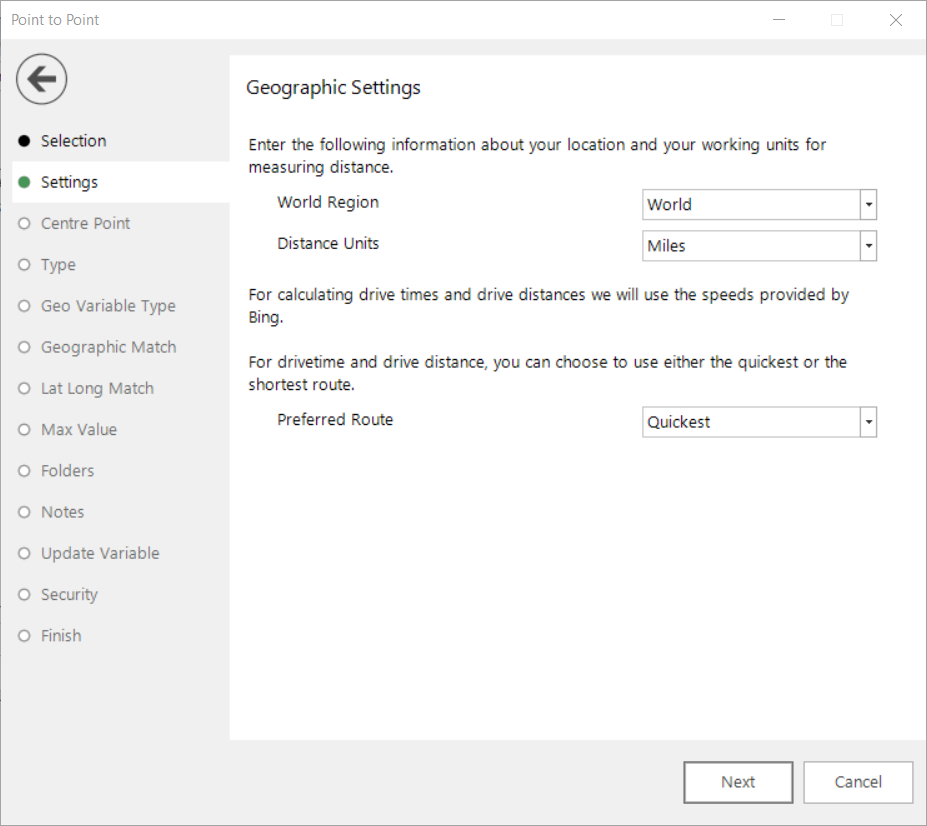
The World Region selects the map to use.
The Distance can be specified as Miles or Kilometres.
The Preferred Route can be set to calculate in terms of quickest time or shortest distance.
Centre point
You now need to specify the point from which distances or drive times should be calculated.
Some examples of what could be entered are:
| Examples | |
|---|---|
| CV34 4EH | Postcode |
| CV34 | Partial Postcode |
| Warwick | Town name |
If you have multiple centre points, they can be entered into a text file and dragged onto the Input File box. When the rest of the steps are complete, the wizard will generate a virtual variable for each of the centre points.
-
Enter the Postcode - CV34 4EH
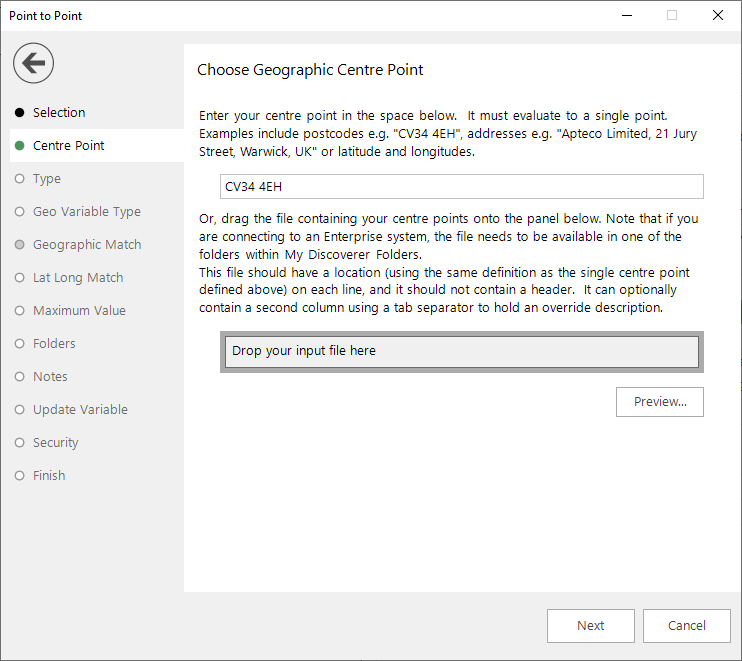
When you click Next, the system geocodes and validates the centre point(s) in the file you have provided and moves you on to the Type step.
Note
Any centrepoint that cannot be matched is reported back to you in the UI.
Type
On this step of the wizard, you choose if the virtual variable should be calculated on Drive Time, Drive Distance, Distance as the Crow Flies or Walking Time.
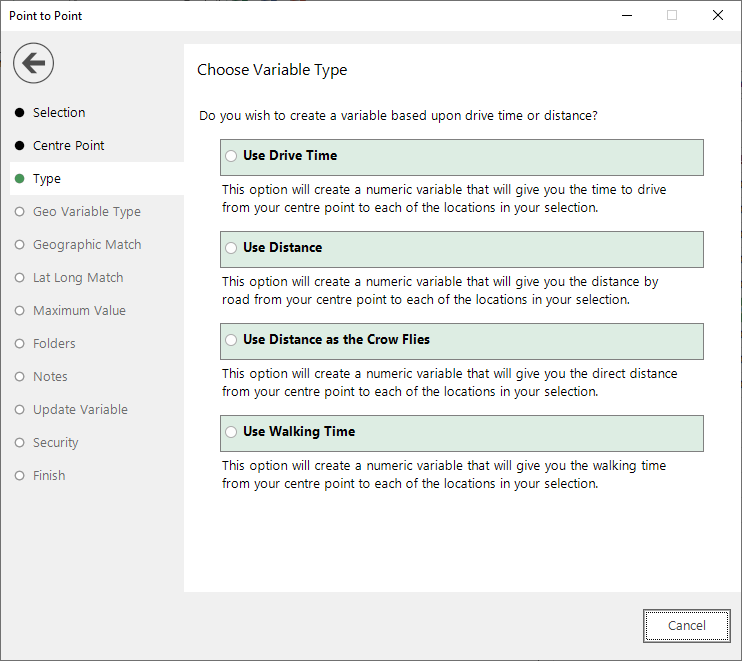
Check the radio button against the drive time or distance option you want to use.
Note
Your choice of variable type at this step will determine options available to you later in the wizard.
In this example:
- Select Use Drive Time
You are automatically taken to the Geo Variable Type step.
Geo variable type
You have two options for creating the virtual variable:
- Use a geographic variable such as Postal Sector, District, etc
Or, if available in your FastStats system:
- Use latitude and longitude variable information
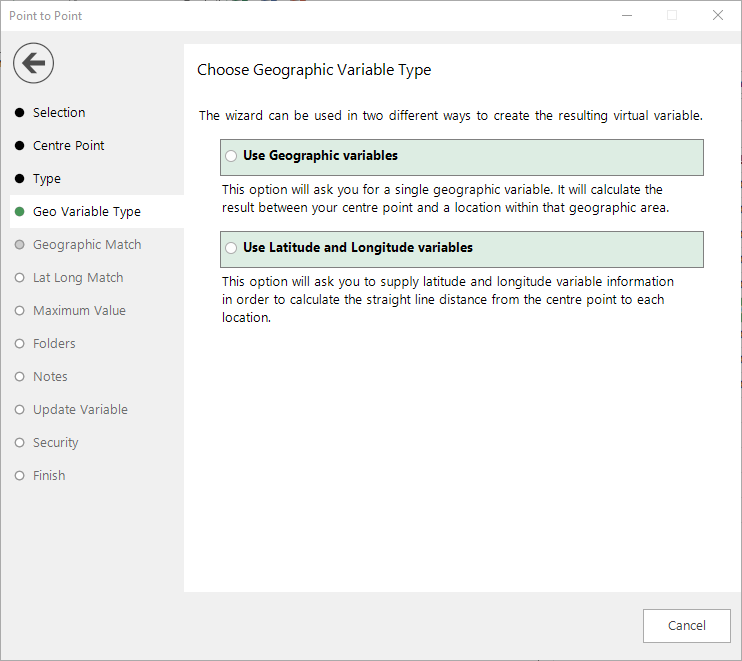
- If you select Use Geographic Variable, you move to the Geographic match step.
- If you select Use Latitude and Longitude variables, you move to the Lat long match step.
Geographic match
This is where you select your geographic variable. You can set Postcode, Postal Sector, Postal District or Postal Area as the geographic variable that provides a point to calculate the drive times or distances from.
In this example:
-
Drag the Postal District variable onto the Drop your geographic variable here dropbox
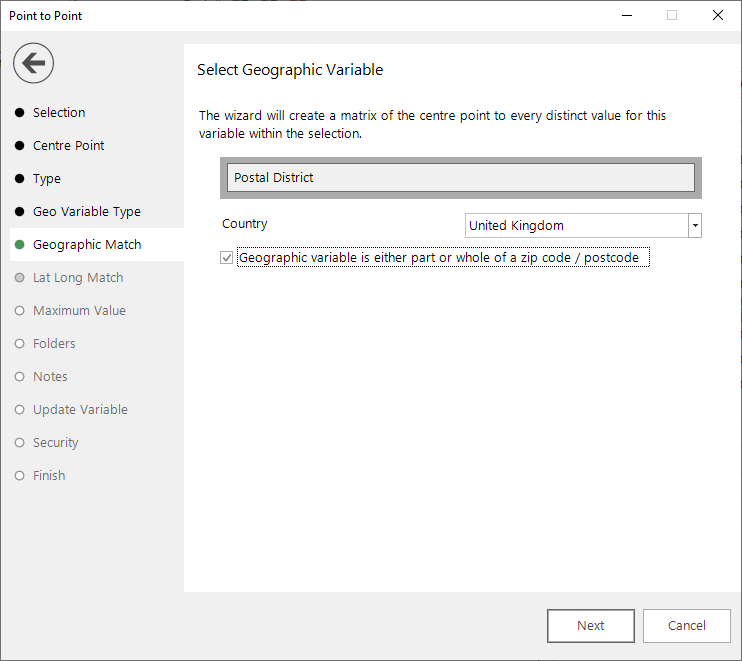
You can specify the relevant country and, also, if the variable you select is full or part of a postcode, then checking the tick-box will help the wizard correctly calculate distances. However, if the variable contains town names etc, leave this tick-box unchecked.
Lat long match
Note
Latitude and longitude variables must have the necessary geo-format property defined in order for you to use them.
If your system contains one latitude and one longitude variable, these will auto-populate into the drop-boxes at this step. When more than one option is available, you must select, drag and drop the variables across. Alternatively:
In Map wizards, where you need to specify latitude and longitude variables, you can right click and access a menu option that allows you to select and add variables which are marked with the relevant GeoFormat property.
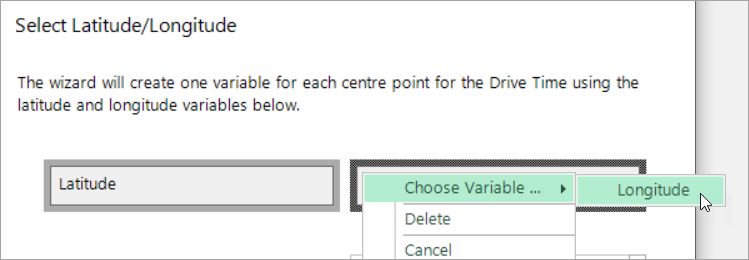
Use of the Bing API isochrone endpoint, in conjunction with latitude and longitude variables, facilitates more time-efficient processing of larger volumes of records and provides more powerful options to select from, including that you can user-specify the level of accuracy in the drivetime calculations.
For the simplest case, you must set the maximum drivetime (for example 0-80 minutes) and accuracy (for example to within 5 minutes) and the resulting variable will be a numeric with values of 5, 10, ..., 75, 80 - or a missing value if further away than 80 minutes.
Note
You are forced to ensure that the Maximum Value (in minutes) is divisible by the Accuracy value you set.
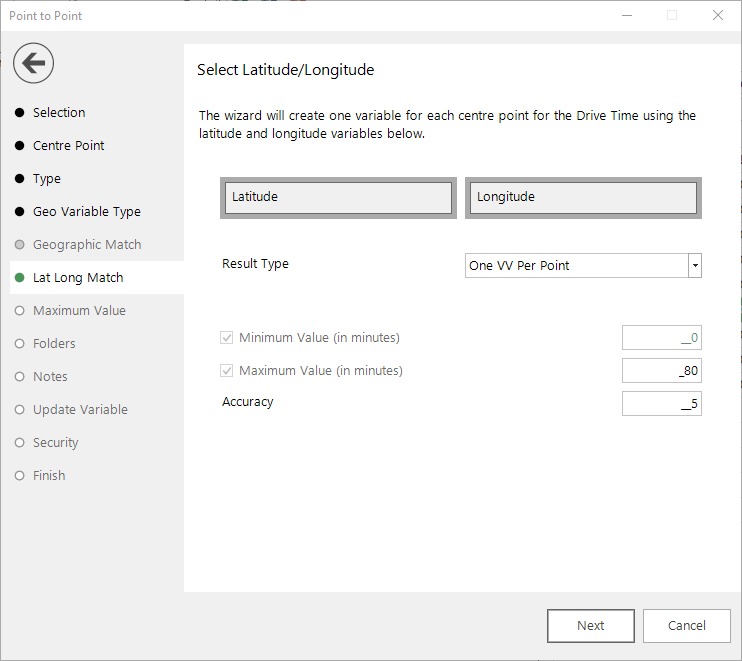
When creating drivetimes with multiple centre points, at this step you have a number of Result Type options to select from:
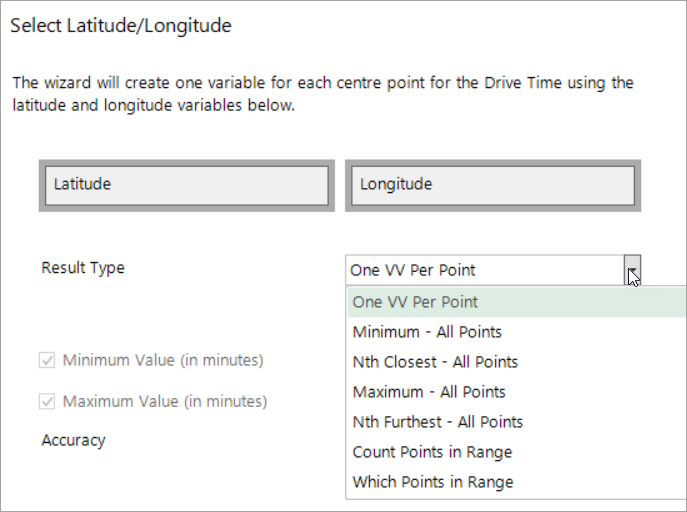
Select to generate the virtual variable with:
-
One VV Per Point (Numeric)
- to calculate the drive time to each centre point for each person (i.e. those identified in the Selection step)
-
Minimum - All Points (Numeric and Selector)
- to calculate the closest of the points by drive time
- choose to create the numeric drive time, the point that is closest as a selector, or both variables
-
Nth Closest - All Points (Numeric and Selector)
- to calculate the Nth (2nd, 3rd, etc) nearest of the points by drive time
- choose to create the numeric drive time, the point that is closest as a selector, or both variables
-
Maximum - All Points (Numeric and Selector)
- to calculate the furthest of the points by drive time
- choose to create the numeric drive time, the point that is closest as a selector, or both variables
-
Nth Furthest - All Points (Numeric and Selector)
- to calculate the Nth (2nd, 3rd, etc) furthest of the points by drive time
- choose to create the numeric drive time, the point that is closest as a selector, or both variables
-
Count Points in Range (Numeric)
- specify a minimum and/or maximum drive time around each centre point and then count the number of these zones that each record fits into
-
Which Points in Range (Flag Array)
- specify a minimum and/or maximum drive time around each centre point and then return which of these zones each record fits into as a flag array variable
The variable you create is determined by the Result Type you select and can be:
- Numeric Only - e.g What is the minimum drivetime to each of the locations?
- Selector Only - e.g. Which one of the locations is the nearest?
- Both - generates numeric and selector variables for you to use
Note
In the case where you create a single selector variable from multiple centre points using a centre point file that has optional descriptions, those descriptions are used in the resulting variable.
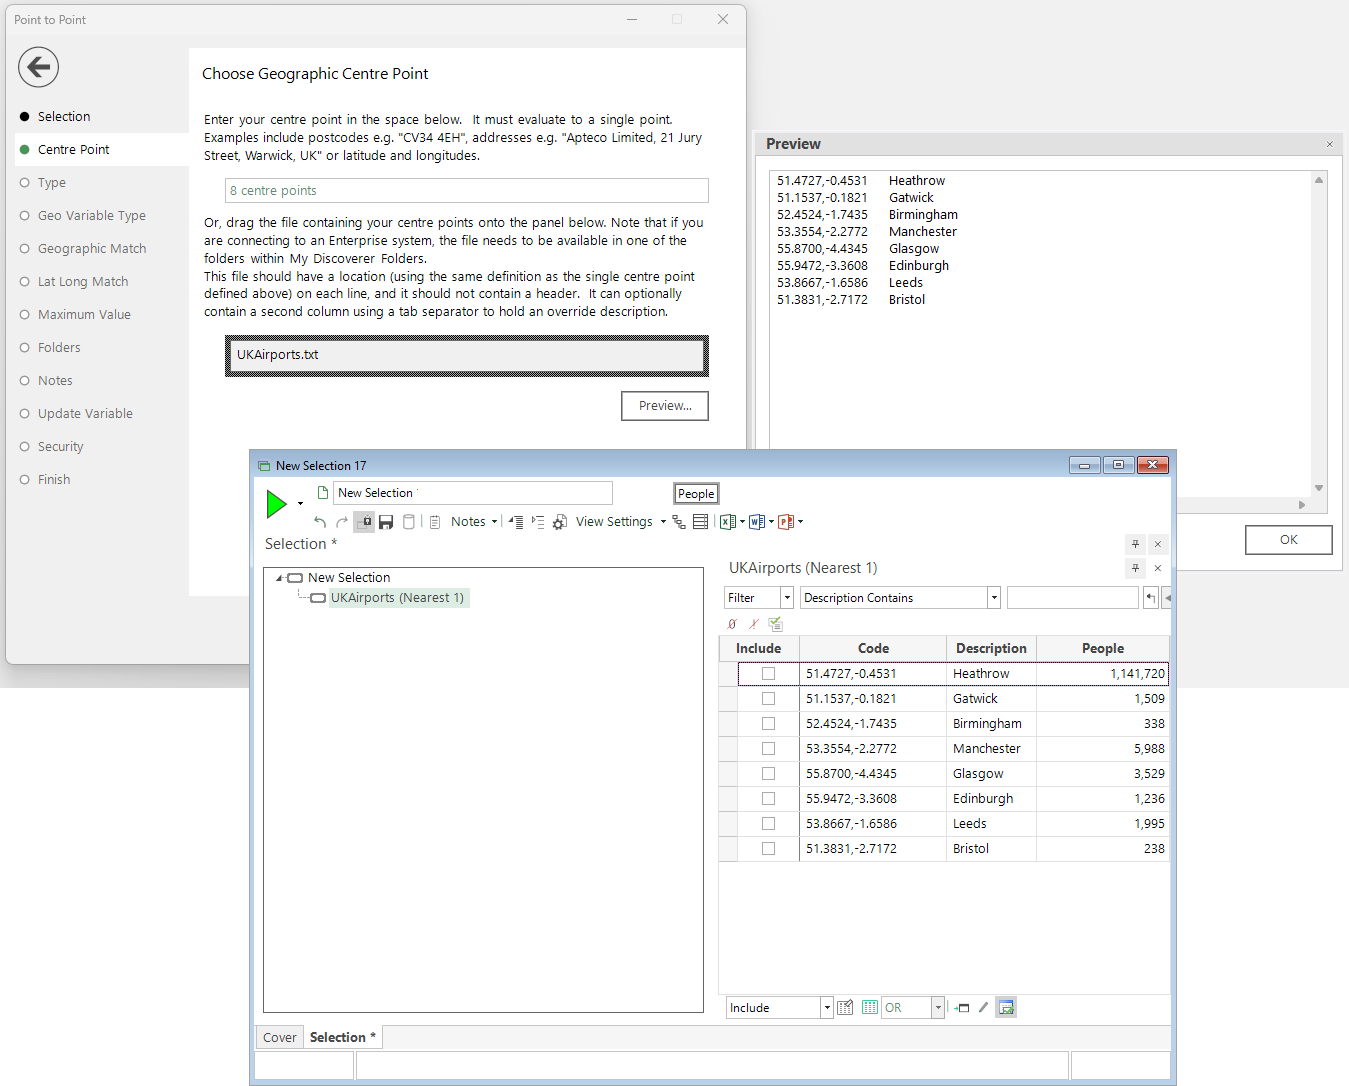
The screenshot below demonstrates this for a 'nearest drivetime' virtual variable with 8 centre points, generated from a file containing the latitude and longitude co-ordinates for the location and name of eight UK airports. The airport name is used in each variable category description instead of the location.
Maximum value
It is possible to limit the records selected by the wizard so that only those within a maximum minutes value of the centre point are calculated.
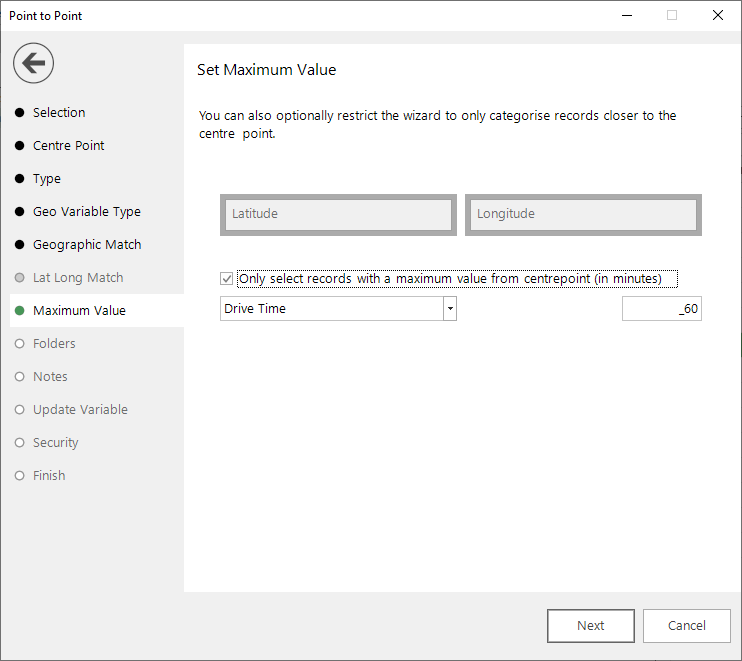
There are 4 options:
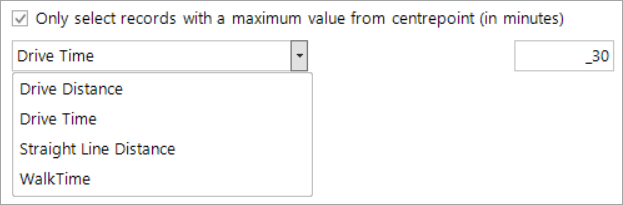
The system defaults to the option you set in the Type step, but you can select to calculate the maximum value in terms of drive time, drive distance, straight line distance or walking time. For example, you may choose to calculate the straight line distance, but only for records within a 30 minute drive time of your centre point. In this example:
- Leave as the default Drive Time option and set to 30 minutes.
Folders
Choose the folder that the new variable should be created in.
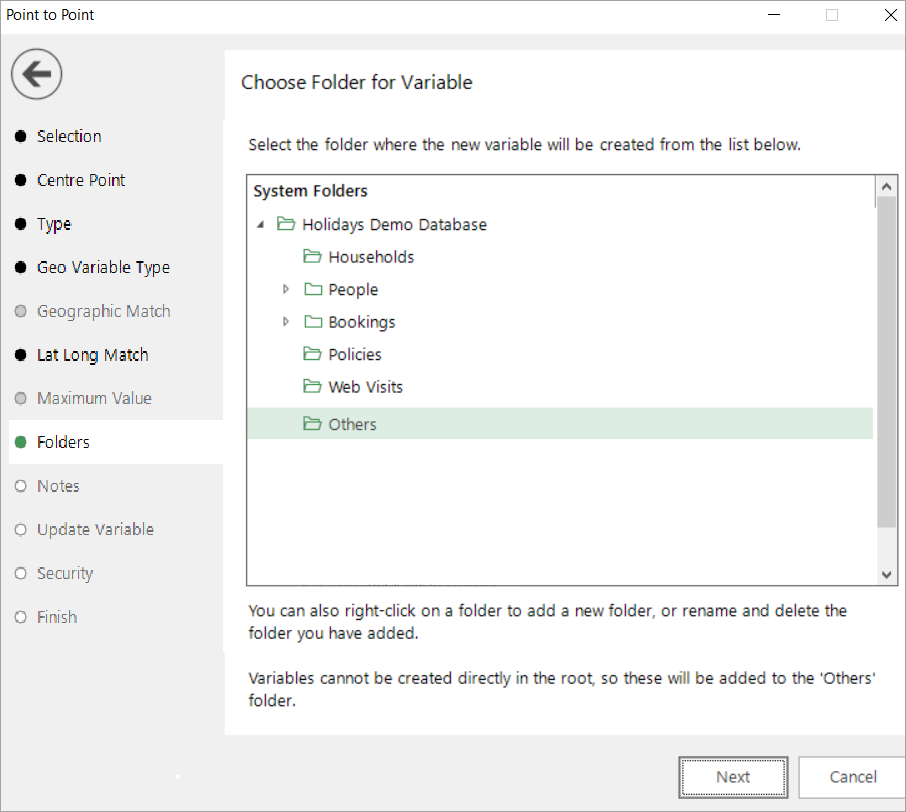
By default, the new variable is placed into the Others folder, but you can highlight an existing folder or, if necessary, create a new folder to hold your Virtual Variable.
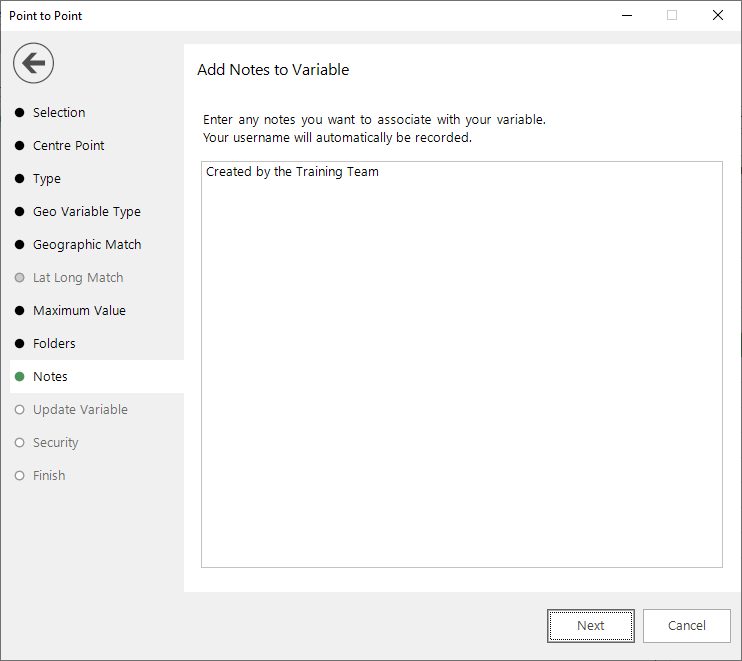
Notes
You can optionally add notes to your variable. These can be viewed later by right-clicking on the variable once it is in the System explorer.
Update variable
Here you can enter the name of the variable that you want to create. Alternatively, drag on an existing variable that will be overwritten.
When working with multiple centre points, you see the red Note text, as per the screenshot below:
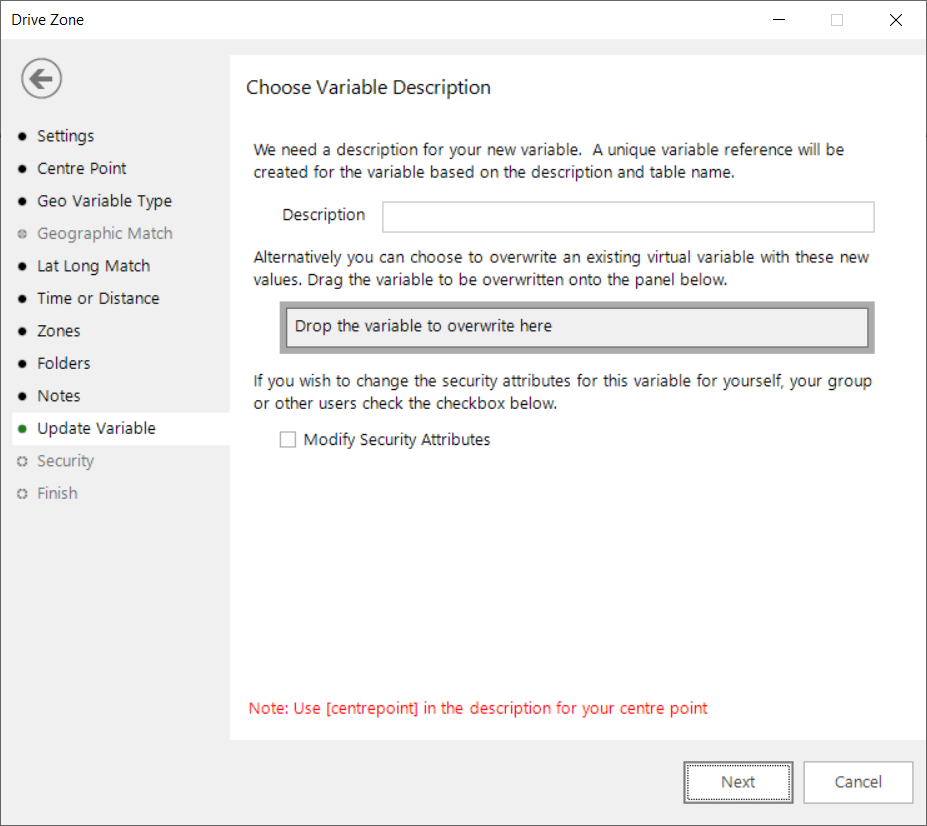
Here [centrepoint] should be used within the variable description to automatically pull through and include the centre point as part of the variable name. This use of [centrepoint] is especially helpful when you have a series of centre points that will generate multiple virtual variables.
Add any other description to this, as required. For example:
- Enter Description from [centrepoint] (Postal District) max 30 mins DT
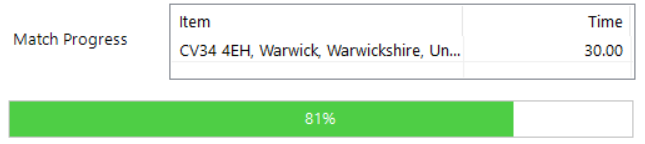
All the records in the selection are grouped by the different values of the specified geographic variable. Then the distance or drive time of each group is calculated from the centre point - up to a maximum, if set - and reported along with the overall progress.
To overwrite an existing virtual variable drag it onto the Drop the variable to overwrite here drop box.
If you are working on an Enterprise version of FastStats, you can check the Modify Security Attributes box to access and amend the Security options for your variable(s).
Warning
Billable transactions apply for Bing Maps - see Bing API for more information.
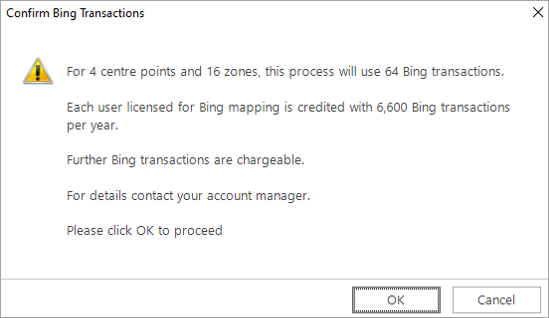
To provide new functionality for geographic mapping functions, billable Bing transactions apply. Each licensed user is credited with 6,600 transactions per year, sufficient for most normal use. For example, an initial calculation using a Point to Point wizard request for 4 centre points, each with 16 zones per point, resulting from setting a 0-80 minutes drive time at a 5 minute accuracy creates 64 billable transactions. Subsequent data refreshes would be free.
Transactions over and above the allocated 6,600 per year are supplied at 1.5 pence each. To protect against unintentional spend on billable Bing transactions, warning messages and maximum volume checks are displayed.
Confirm Bing transactions
You must acknowledge and confirm the number of Bing transactions required to create and/or update the virtual variable(s).
Geographic variable
Here, the number of API requests will often be the number of zones, or the cardinality of the geographic variable used. If a maximum drive time is specified, this maximum is applied and only the locations reachable in that time are counted. If multiple centre points are defined, each one is calculated separately to give the total number of transactions.
Latitude and longitude variables
Once you have chosen your variable description, clicking Finish will open a dialog that confirms the number of Bing API requests needed to create the variable(s).
The following screenshot is based on the example above - four UK postcodes defined as centre points, with 16 zones per point, resulting from setting a 0-80 minutes drive time at a 5 minute accuracy:
Note
Although the initial calculations are chargeable, subsequent data refreshes are free.
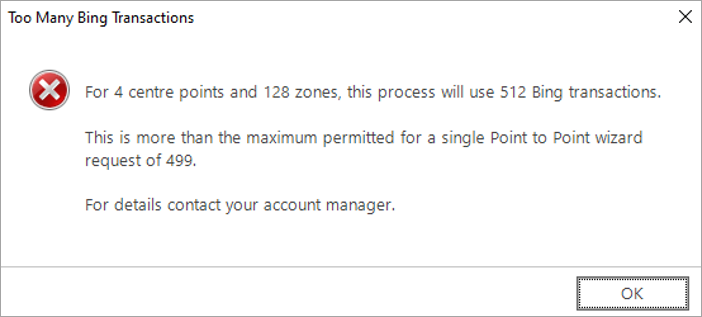
Too many Bing transactions warning
If you try to proceed when your permitted maximum is exceeded, you will see the following message and should contact the relevant person within your organisation:
Security
This is an optional step available on the Enterprise version of the software and is accessible by clicking Modify Security Attributes on the previous Update Variable step.
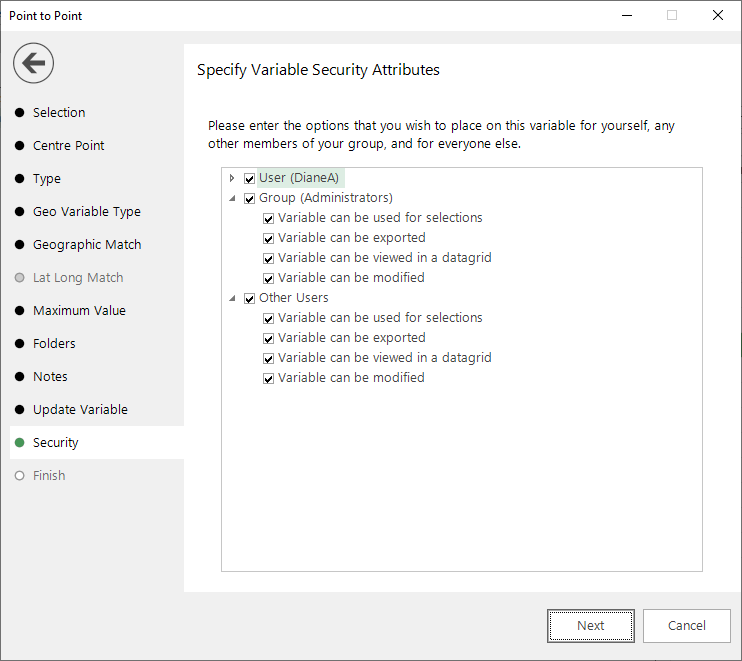
Use the tick boxes to set the security setting you wish to apply to this variable.
The system will start the match process and the Match Progress will be visible at the bottom of the window, switching to the Finish step once complete.
Finish
This is the final screen of the wizard and shows that the processing has completed.
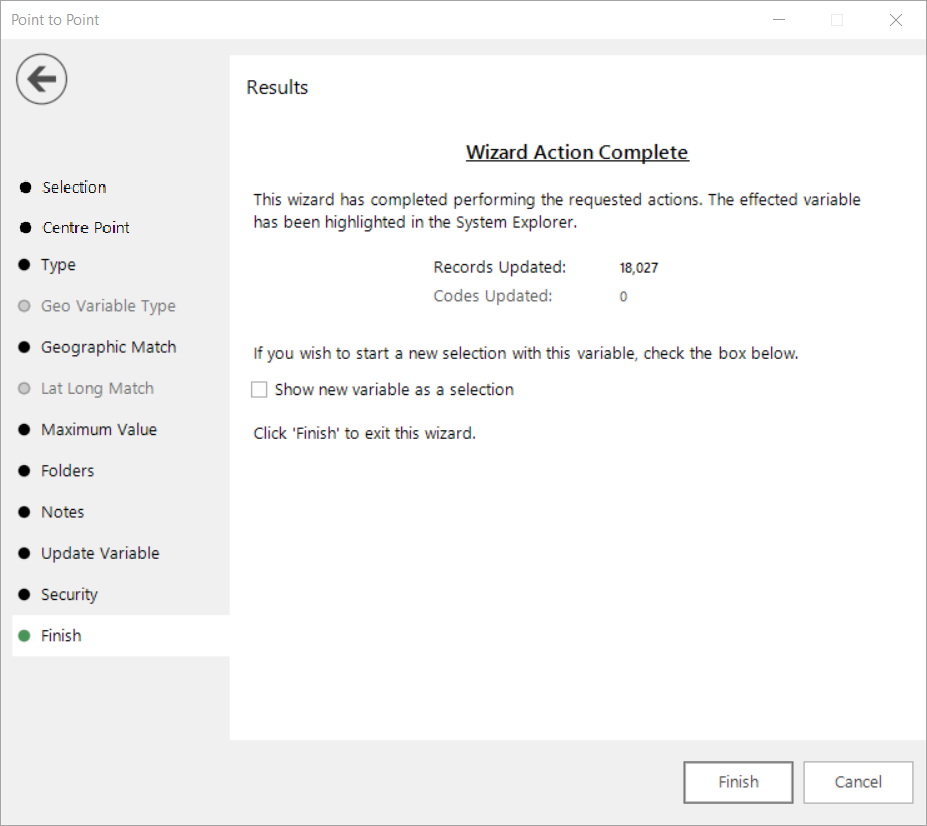
Tick the Show new variable as a selection box if you want to view the variable when the wizard is closed.
Click Finish to close the wizard.
Your virtual variable(s) is now visible within the Others folder of the System explorer window and you can use this just as you would any other variable of its type.