Time delays
A time delay step creates a pause between stages in your multi-stage campaign journey. This allows you to wait before recipients move to the next stage and helps optimise the timing of your campaign.
Adding a time delay
To add a time delay:
- Click the + sign after your message step.
- Under Controls, click Time Delay. A new step appears in campaign journey.
-
Click the step, or click the option menu and Edit.
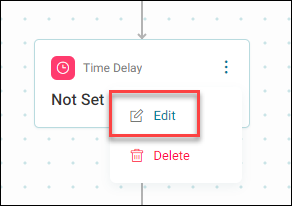
-
Give your time delay step a descriptive name. Make sure it is informative. For example, “Wait for 2 Days”.
- Click Create.
A side panel appears on the right side of the screen. This is where you can define the time delay criteria. There are two options:
- Wait - Specify a timeframe to wait.
- Specific time - Move recipients on at a certain time or date, either on a single or recurring schedule.
Wait criteria
To define a timeframe to wait:
- Click Wait.
-
Here you can choose the timeframe to wait by increasing the numeric and then specifying the different timeframe options.
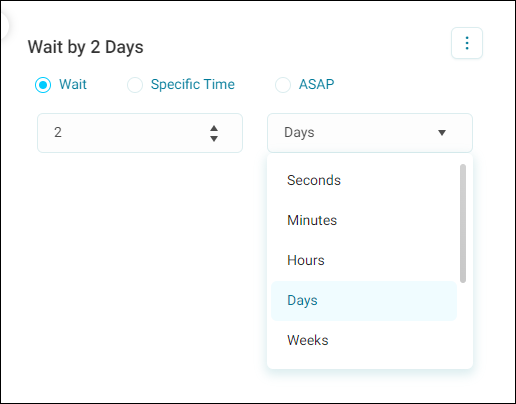
In this example, we are going to wait 2 days.
-
Click Apply.
Once applied the time delay stage updates with the correct delay information.
Specific time
To specify a time and date:
-
Click Specific Time.
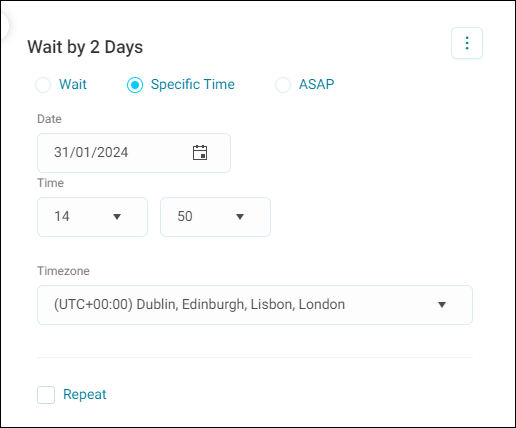
Here you can change the date and time as well as the timezone, if required.
-
If this schedule needs to repeat, tick the box Repeat and use the drop down menu to specify day, week, month or year.
- Optionally, exclude weekends by checking the box.
-
You can also continue with the repeating schedule until manual intervention or to specify an End Date. If a campaign needs an end date, perhaps if an offer laspses or as a season changes, click At Date and then specify the end date.
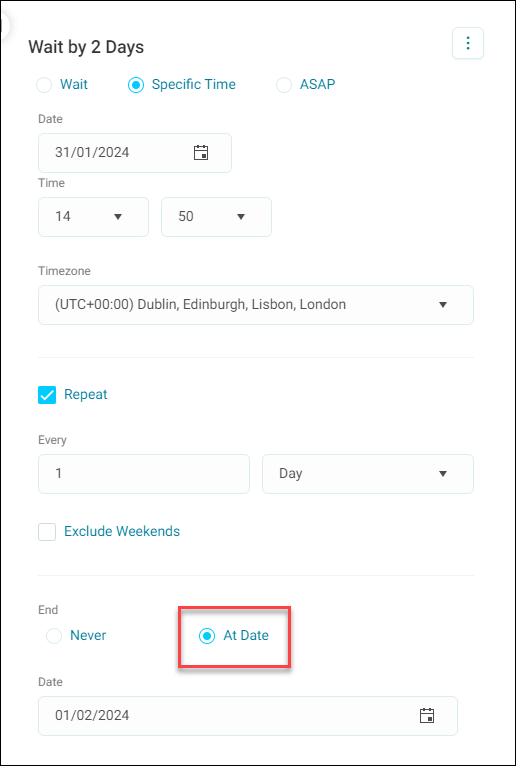
-
Click Apply.
Once applied, the time delay stage updates with the correct delay information.