Spotler
You can configure your PeopleStage and Orbit channels to make use of the integration with the Spotler broadcaster.
Prerequisites
Ensure you're using the latest Q4 2024 Apteco Suite. Upgrade your FastStats32Service and ensure the PeopleStage client matches this version by updating the Binaries. See Installation and updates.
PeopleStage channel configuration
-
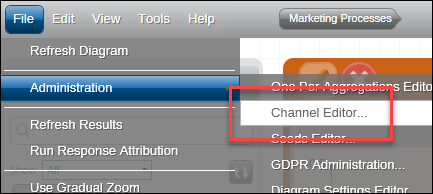
Go to the PeopleStage channel editor: File > Administration > Channel Editor.
-
Create a new channel with the following settings:
- Response Key File Type:
Urn with Broadcast Id - Broadcaster: Spotler
- Username: A username should be specified but isn't used in this case
- Password: This needs to be your
spotler_api_key - Message Content Type:
Broadcaster Template - Retrieve existing message names: tick this box
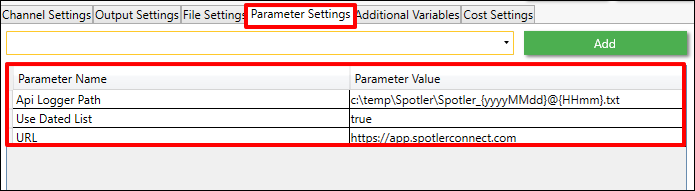
API Logger Path (recommended, for tracking requests and responses for debugging):
- API Logger Path:
c:\temp\Spotler\Spotler_{yyyyMMdd}@{HHmm}.txt - Use Dated List: true
- URL:
https://app.spotlerconnect.com
- Response Key File Type:
Orbit channel configuration
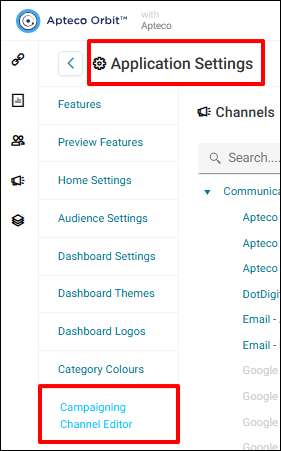
- Go to the Orbit channel editor.
-
Click + Item to create a new channel.
- Response Key File Type:
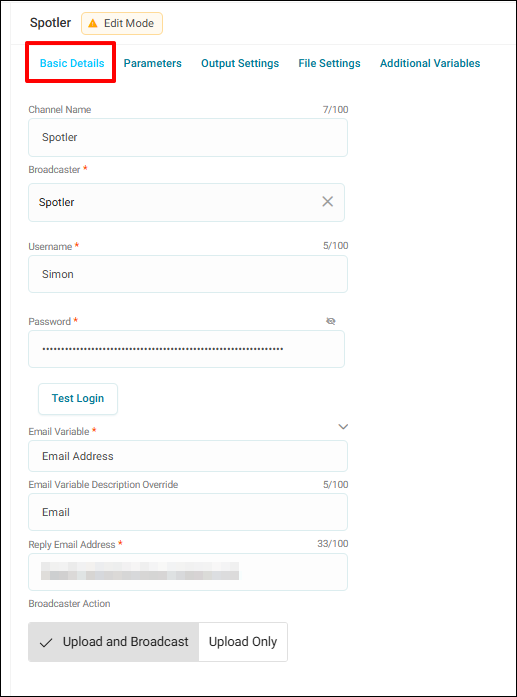
Urn with Broadcast Id - Broadcaster: Spotler
- Username: A username should be specified but isn't used in this case
- Password: This needs to be your
spotler_api_key - Email Variable: Click in the box and choose the variable containing the Email Addresses
- Email Variable Description Override: Email
- Reply Email Address: Add the required reply address
- Response Key File Type:
-
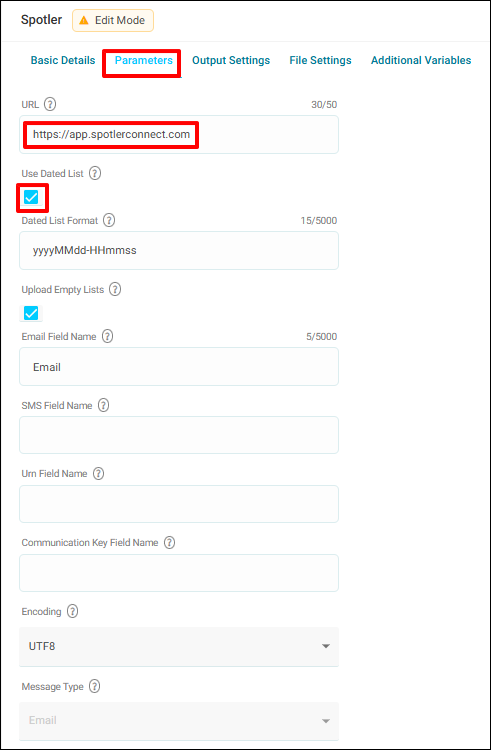
Set the following in Parameters:
- Use Dated List: tick the box
- URL:
https://app.spotlerconnect.com - API Logger Path:
c:\temp\Spotler\Spotler_{yyyyMMdd}@{HHmm}.txt
- Response Key File Type:
Urn with Broadcast Id - Message Content Type:
Broadcaster Template - Retrieve existing message names: tick this box
Template and database field setup
You can design your email content in Spotler MailPro:
-
Database fields—use fields like
Firstname,Lastname, orDateOfBirthfor static data held on the Contact record. Reference them in templates using{{ contact.fieldname }}, e.g.{{ contact.Firstname }}.Note
Apteco substitutes spaces for underscores in field names (e.g.
Phone number→Phone_number). -
Dynamic fields (DMD fields)—use for values that change per send, e.g. discounts or transactional data. Reference format:
{{ contact.DMD_fieldname }}, e.g.{{ contact.DMD_discount }}.
See Spotler documentation for template configuration.
Spotler campaigns
To configure your deliveries:
- Choose an email template from the drop-down list within your message step.
-
Specify a group name for the delivery.
Note
Groups are automatically created with a unique datetime suffix for each send.
-
Define your content either in the channel or at the content step.
- Use
DMD_prefixed fields for transactional data (e.g.DMD_discount), sent during email trigger without updating Spotler's database. - Use non-
DMD_fields such ascontact.Firstnamefor persistent data across communications for the same recipient.
When the campaign is published: a new group is created, selected recipients are added to the group, and the email template is triggered for each recipient in the group.
Collecting responses
-
Download the DigitalIntegrations.zip file from the Apteco Portal and install the FastStats Email Response Gatherer (FERG).
Note
If you are using an earlier Apteco software version than Q4 2024, Spotler will not appear as an option in the Broadcaster dropdown.
-
Run the FastStats Email Response Gatherer Configurator with the following settings:
- Connection String: pointing at your response (RS_) database
- Broadcaster: Spotler
- Username: the username needs to be specified here but isn't used to connect
- Password: the
spotler_api_key - SMTP Properties: add your email server details and tick Send Email on Error
- RESPONSEPERIOD:
3M(rolling 3-month period) - URL:
https://app.spotlerconnect.com
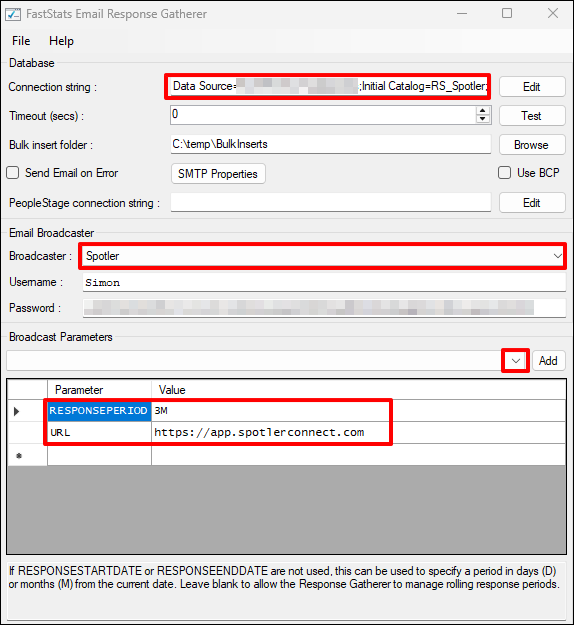
Example FERG configuration
<EmailResponseGathererConfiguration>
  <ConnectionString>Your connection string to the RS_ database</ConnectionString>
  <ConnectionTimeout>1200</ConnectionTimeout>
  <BulkInsertFolder>c:\Temp\BulkInsert</BulkInsertFolder>
  <Broadcaster>Spotler</Broadcaster>
  <Username>username</Username>
  <Password>spotler_api_key</Password>
  <SendEmailOnError>True</SendEmailOnError>
  <Parameters>
    <Parameter>
      <Key>URL</Key>
      <Value>https://app.spotlerconnect.com</Value>
    </Parameter>
    <Parameter>
      <Key>ResponsePeriod</Key>
      <Value>3M</Value>
    </Parameter>
  </Parameters>
  <Port>25</Port>
  <Server>exchange.apteco.com</Server>
  <SSL>False</SSL>
  <From>from email</From>
  <To>to email</To>
</EmailResponseGathererConfiguration>
Notes
- Spotler updates response files once daily. Coordinate with Spotler to determine the update schedule.
- Responses include metrics such as email opens, clicks, and bounces.
- For any issues or advanced configurations, refer to Spotler's documentation or contact Apteco Support.