Enabling Orin
Before users can use Apteco's AI tool Orin on-premise, a system administrator must complete the following installation and configuration steps:
- Installing Chat API
- Migrating the Orbit API configuration
- Configuring Chat API
- Enabling web sockets in the API
- Repairing the Orbit UI
- Enabling as a preview feature
Installing Chat API
Before you can access Orin, you must use the Orbit Updater to download the Chat API functionality.
To install the Chat API:
-
Run
OrbitUpdaterConfigurator.exeas Administrator from: -
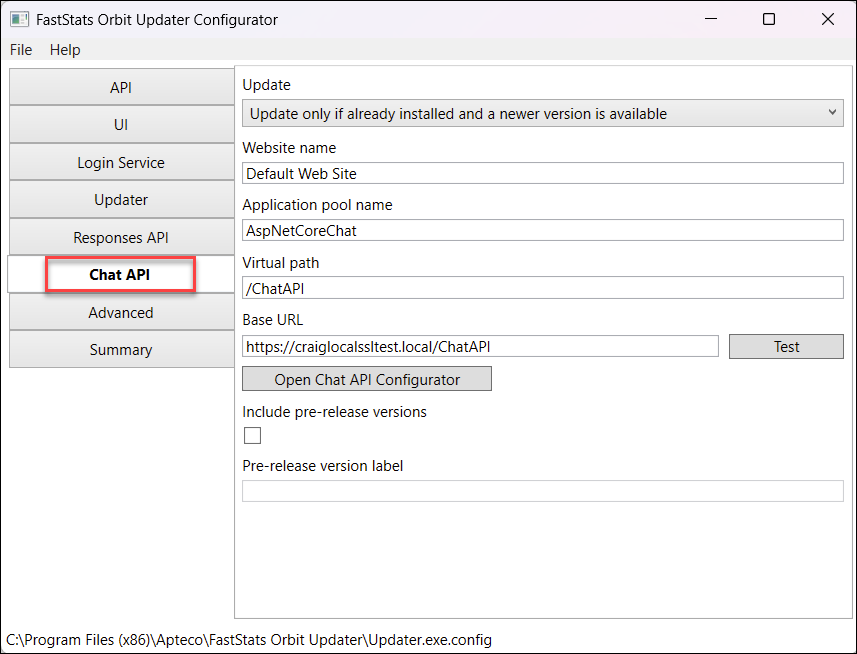
Select the Chat API tab.
-
Copy the Base URL from the API tab and paste it into the Base URL field on the Chat API tab.
-
Change the Base URL in the Chat API tab to refer to
ChatAPIinstead ofOrbitAPI.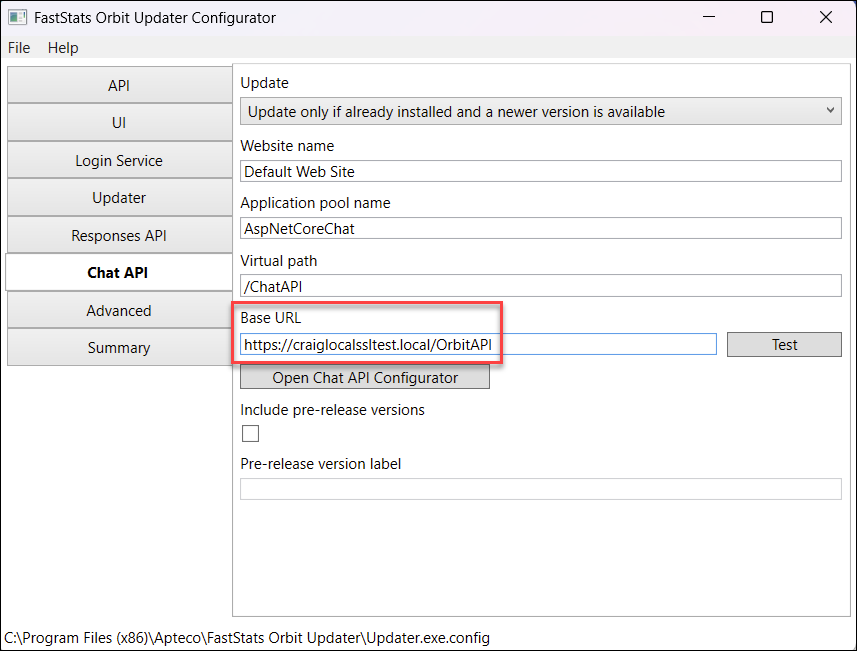
Note
For a multi-API system, you also need to:
- Change the virtual path to
{your_system_folder}/ChatApi - Change the application pool name from
AspNetCoreChattoAspNetCore{your_system_name}Chat(no spaces)
- Change the virtual path to
-
Restart the FastStats Orbit Updater service.
You can monitor the updater progress in Applications and Services Logs > FastStatsOrbitUpdaterLog in Windows Event Viewer.
Migrating the Orbit API configuration
Before you begin
You need:
- Access to your FastStats configuration database
- A connection string for a user with table creation rights (only if the
OrbitConfigurationstable doesn't exist)
Migrate the configuration
To migrate your Orbit API configuration:
- In the Orbit Updater, select the API tab.
- Click Open API Configurator.
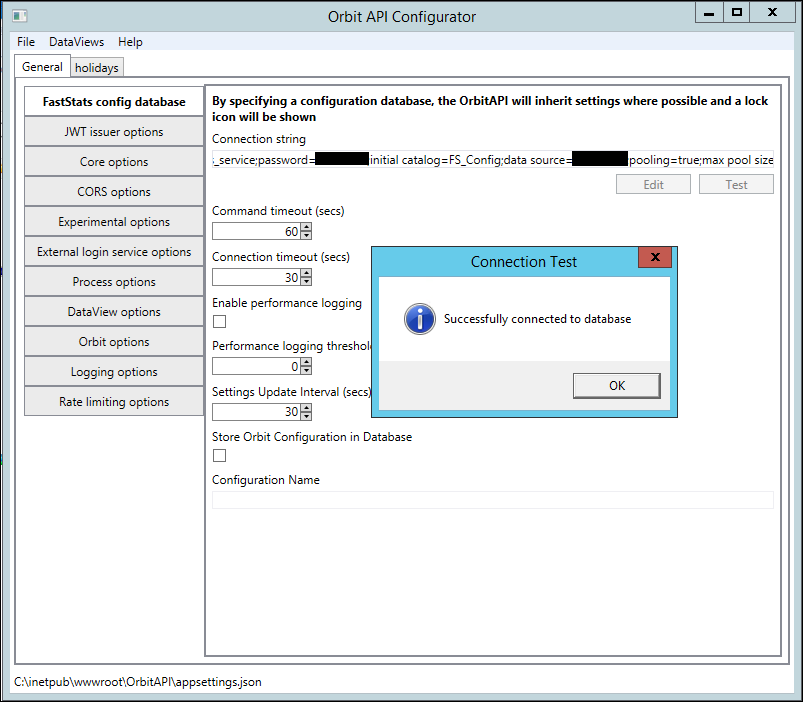
- In the FastStats config database tab, enter your connection string in the Connection string field. Your configuration database is typically named
FS_Config, but may have a different name. -
Click Test to verify the connection.
-
Select Store Orbit Configuration in Database. This enables the Configuration Name field (default value:
Orbit) and displays Chat API options.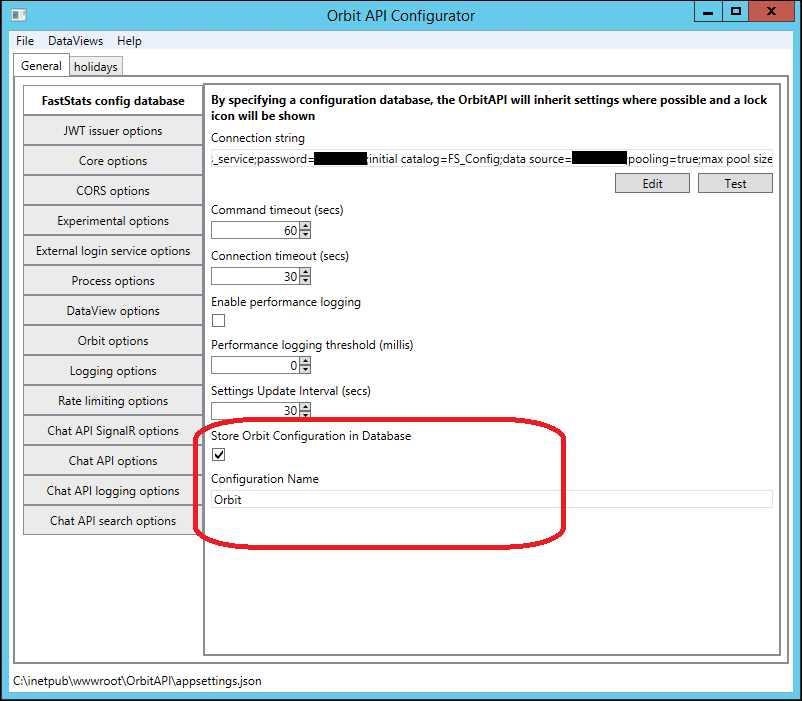
Note
Only change the Configuration Name value if you have multiple Orbit installations using the same configuration database.
-
Select File > Save.
If the
OrbitConfigurationstable doesn't exist, the tool attempts to create it automatically. If your user lacks the required permissions, you are prompted to enter a connection string for a user with table creation rights. Click Edit to modify connection string values.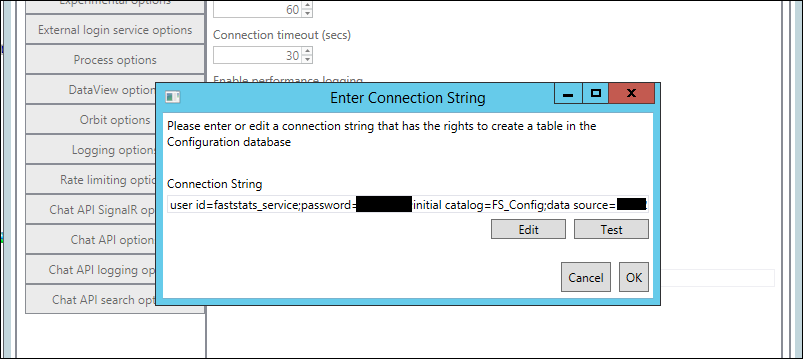
-
Close the API configuration tool.
Configuring Chat API
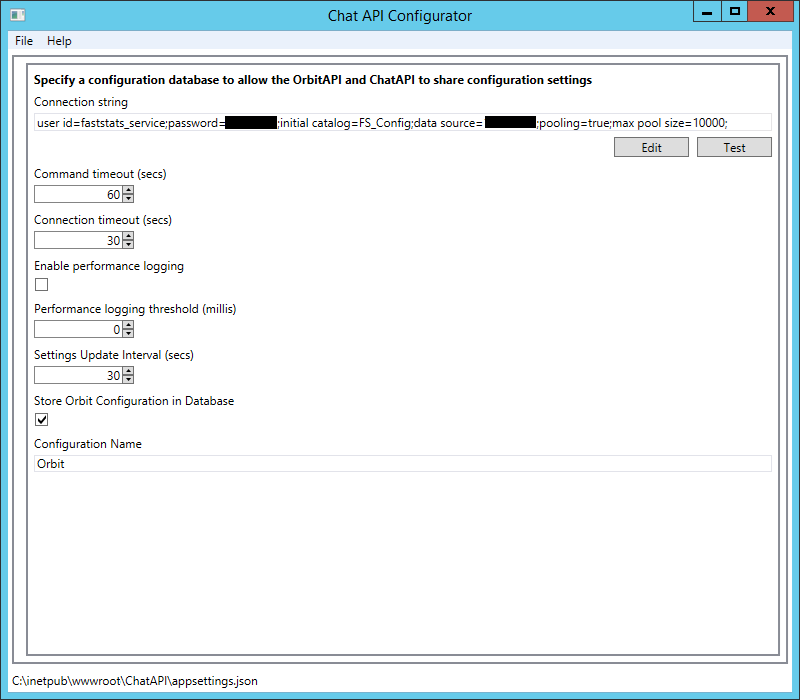
To configure the Chat API:
- In the Orbit Updater, select the Chat API tab.
- Click Open Chat API Configurator.
- In the FastStats config database tab, enter the same connection string you used in the Orbit API configuration tool.
- Click Test to verify the connection.
- Ensure Store Orbit Configuration in Database is selected, and that Configuration Name matches the value from the Orbit API configuration tool.
- Select File > Save. The settings save immediately because the database is already configured.
- Close the tool.
For future configuration changes, use the Orbit API Configuration tool unless you are moving the FastStats configuration database.
Update Chat API options
To configure the Chat API URL:
- Open the Orbit API Configuration tool.
- In Chat API options, verify the URL field contains the correct Orbit API URL. This is typically the same URL configured in the API tab of the Orbit Updater (for example:
https://[your-server]/OrbitAPI). - Select File > Save.
- Restart the Chat API process to apply the changes—in IIS Manager, stop and start the App Pool associated with the Chat API.
Enabling web sockets in the API
In the Orbit API Configurator, check that the Enable Web Sockets box is ticked under Orbit options.
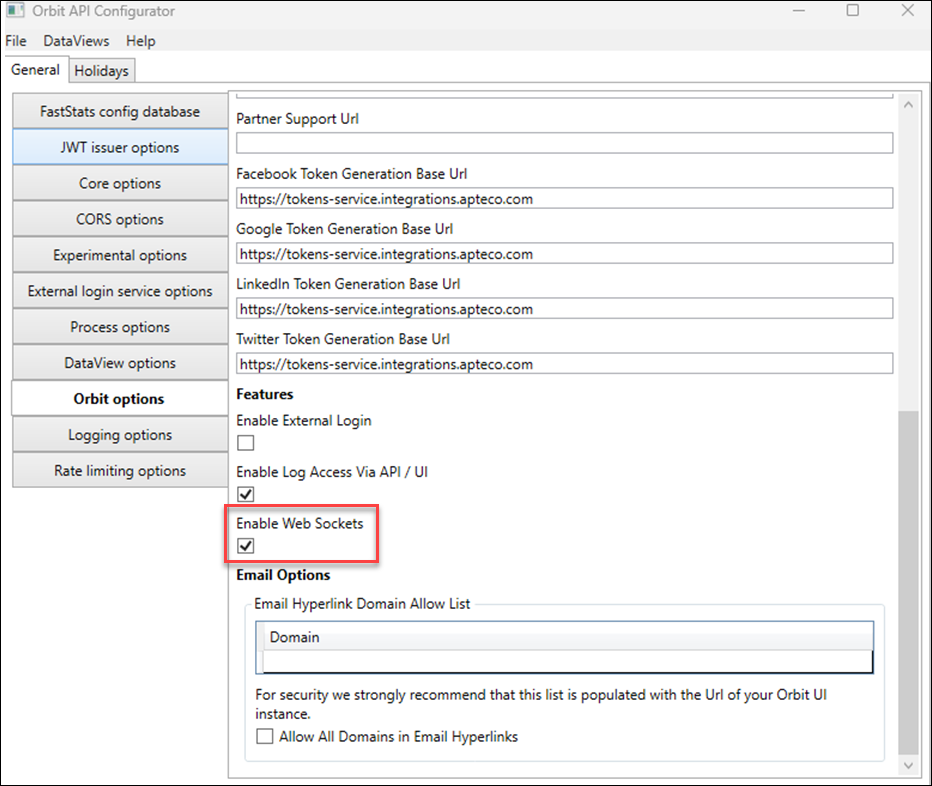
If it is not ticked, tick it, then save and close the API Configurator.
Repairing the Orbit UI
You must repair the Orbit UI so that the config.json file within the assets folders has the correct chatApiURL defined.
In the following example, the file at C:\inetpub\wwwroot\Orbit\en\assets\config.json is still referring to localhost:
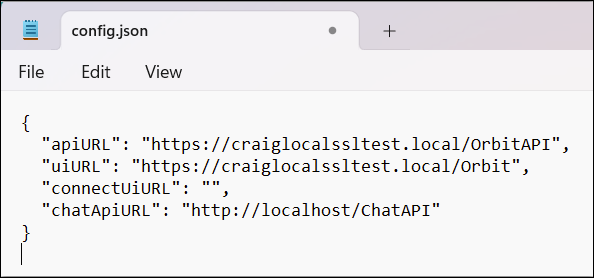
Completing a Repair on the UI populates chatApiURL with the required value.
To repair the Orbit UI:
-
Run
UpdaterConfigurator.exefrom within: -
Select the Summary tab.
-
Click Repair against the Orbit UI entry.
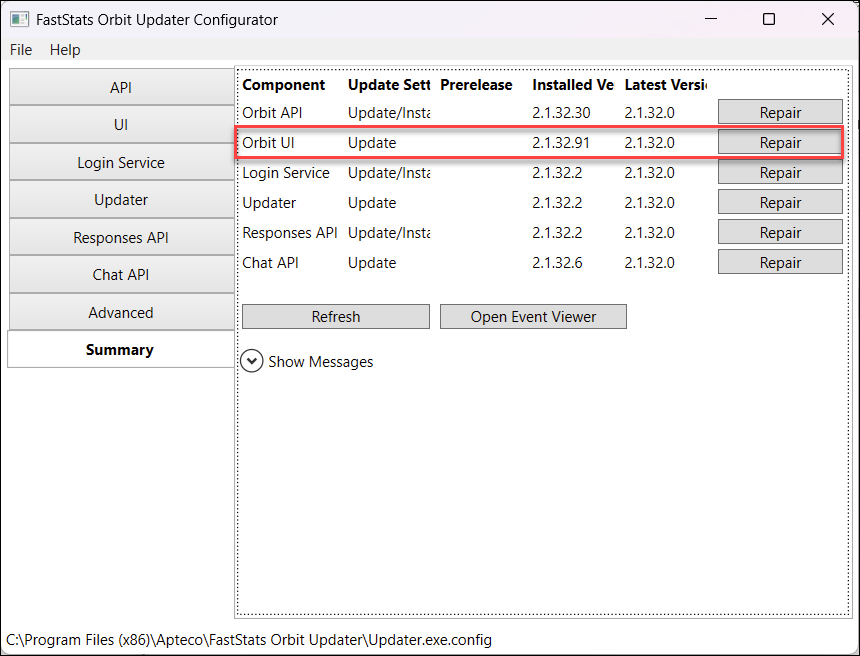
-
Click Yes when prompted.
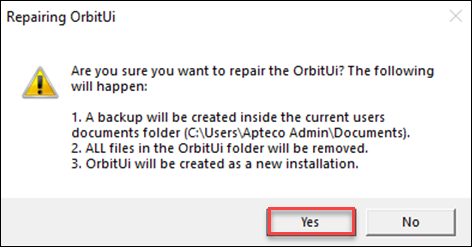
-
The Repair button changes to Repairing...
-
Click OK when the process has finished.
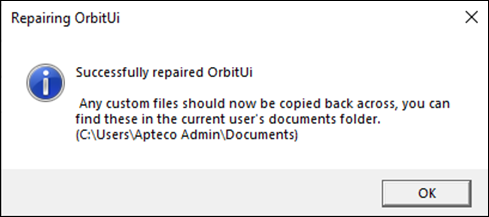
Enabling as a preview feature
To access Orin in Orbit, you must enable it as a preview feature.
- Log into Orbit as an Administrator.
-
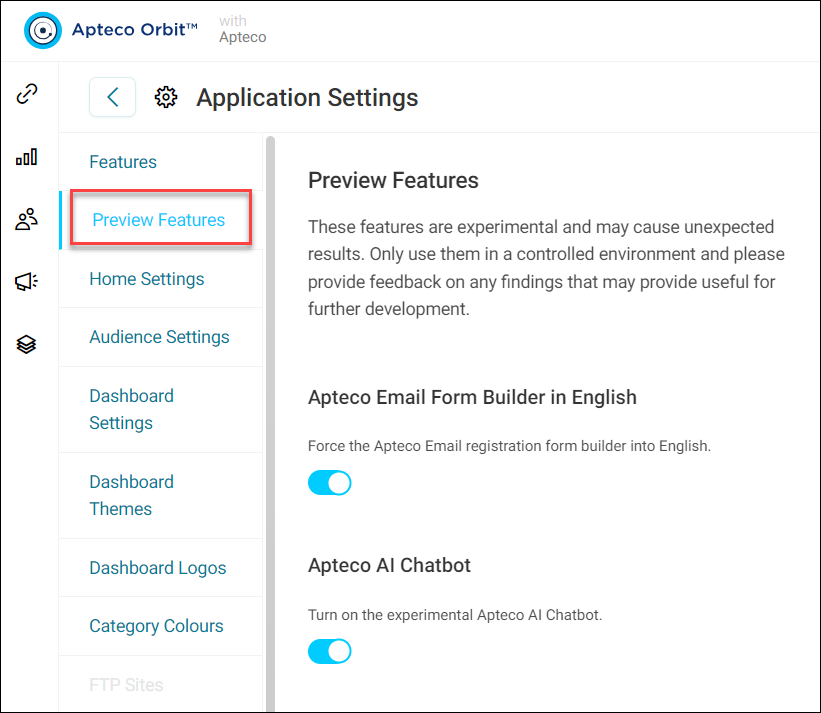
Select the Preview Features tab.
-
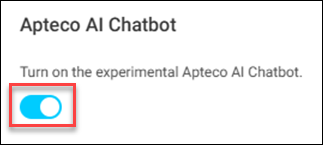
Toggle on the Apteco AI Chatbot setting.
-
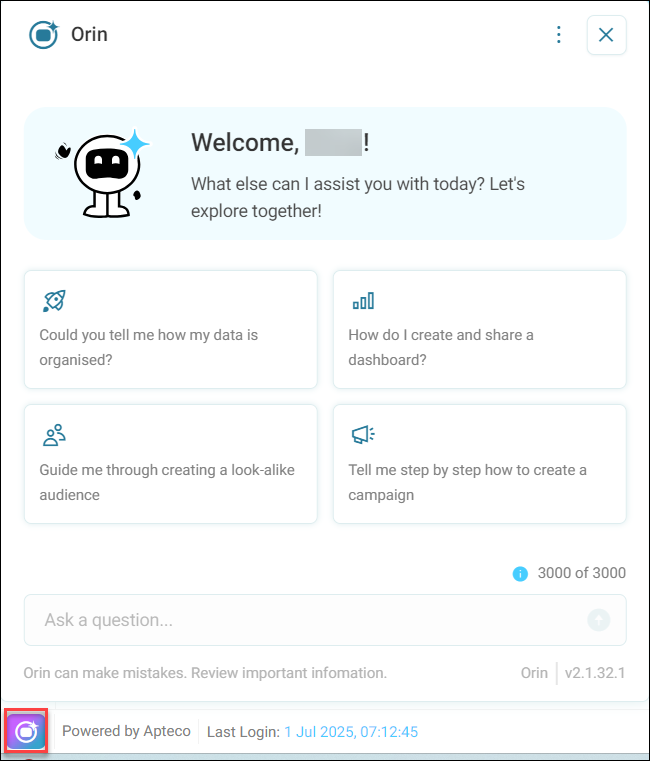
Log out and log back into Orbit. Orin now appears in the bottom left-hand corner of the Orbit UI.