FastStats plugin configuration
Configuring the upload table
To configure an upload table:
-
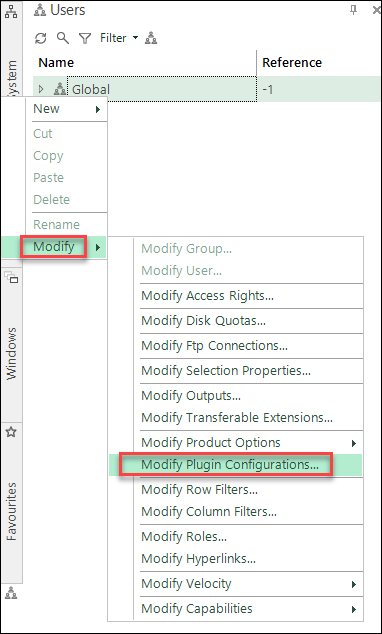
Open Apteco FastStats, select the Users explorer, right-click the Global node and navigate to Modify > Plugin Configurations.
-
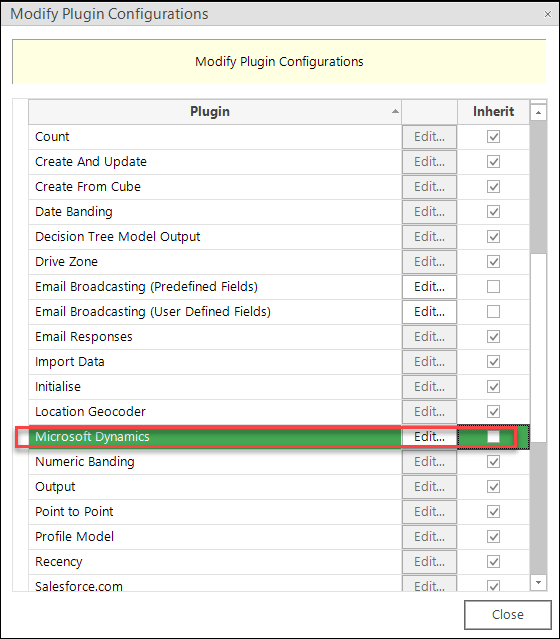
Expand the Wizard node, then clear the Inherit check box for Microsoft Dynamics and click Edit.
-
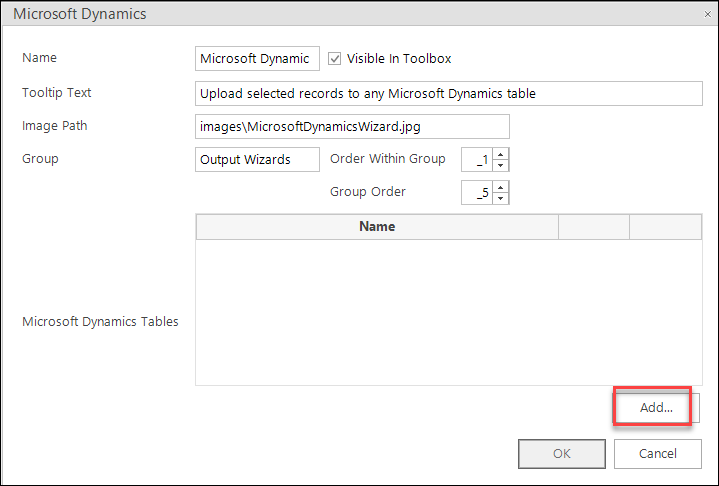
Click Add to add a new Microsoft Dynamics Table.
-
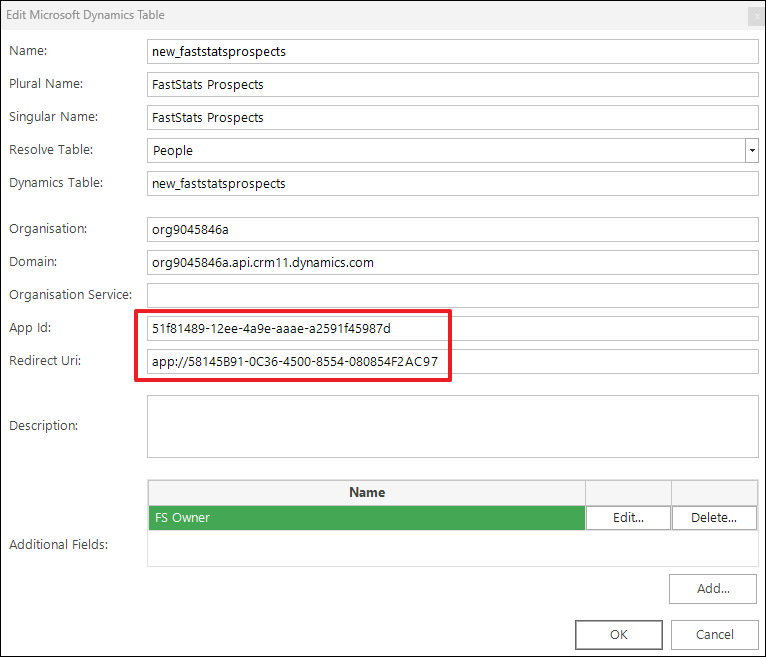
Enter the Microsoft Dynamics table name"”for example,
new_faststatsprospects. The Table Name must match the table name in Dynamics 365.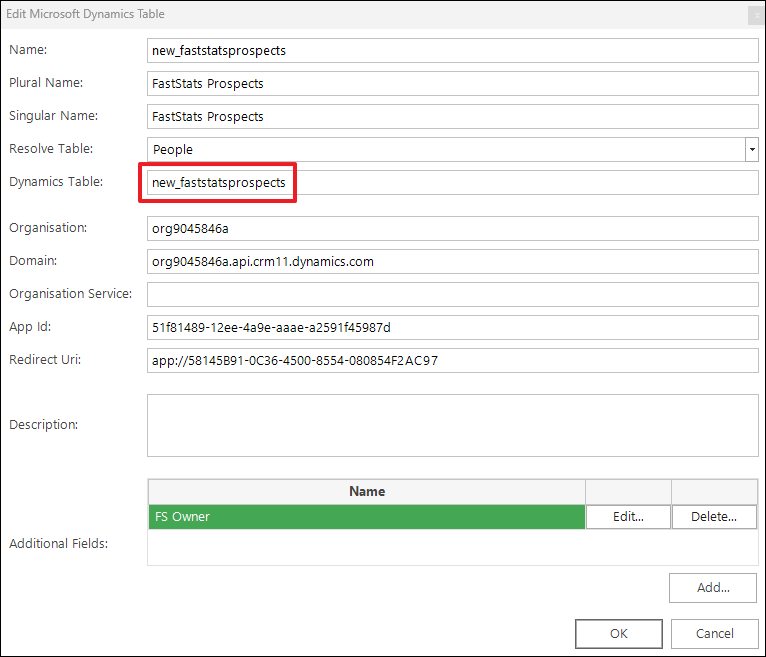
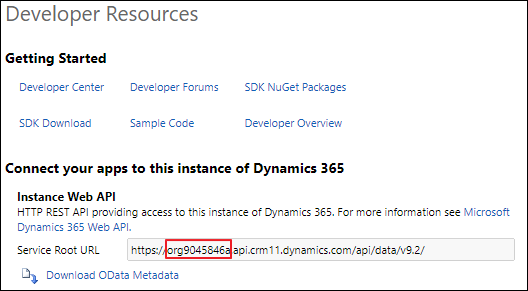
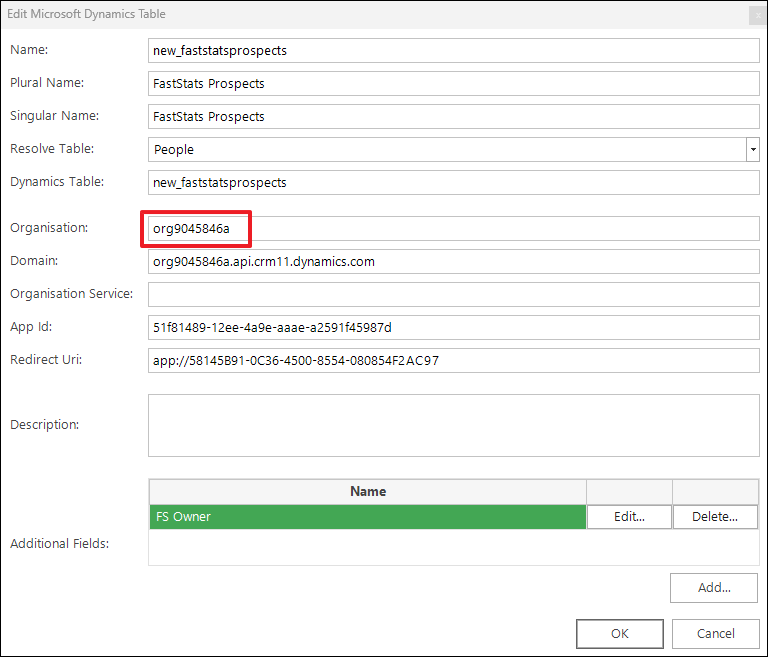
Find the organisation here:
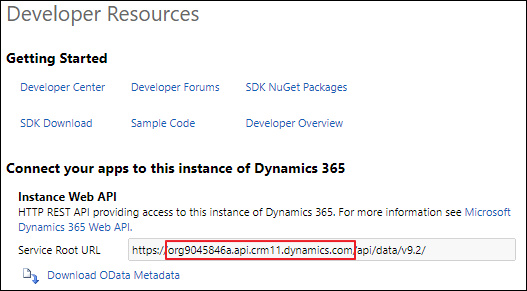
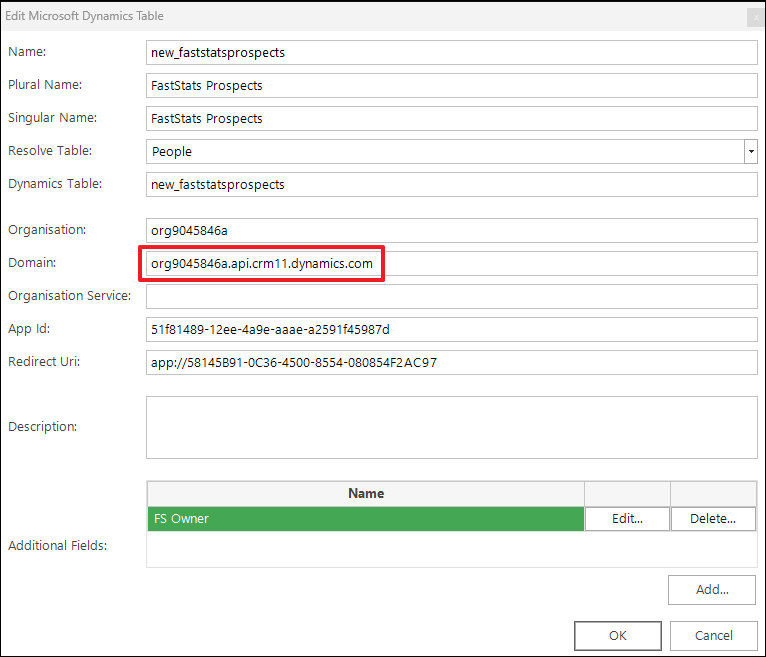
Find the domain here:
The App Id and Redirect Uri are the same unless you have your own Dynamics app:
- App Id:
51f81489-12ee-4a9e-aaae-a2591f45987d - Redirect Uri:
app://58145B91-0C36-4500-8554-080854F2AC97
Tip
Organisation Service is not needed for Microsoft Dynamics 365, but is required for your own Microsoft Dynamics CRM server. This is an example Organisation Service URL from a Microsoft Dynamics server hosted in an Azure virtual machine:
http://faststatscrm.cloudapp.net/AptDynCRMDev/XRMServices/2011/Organization.svc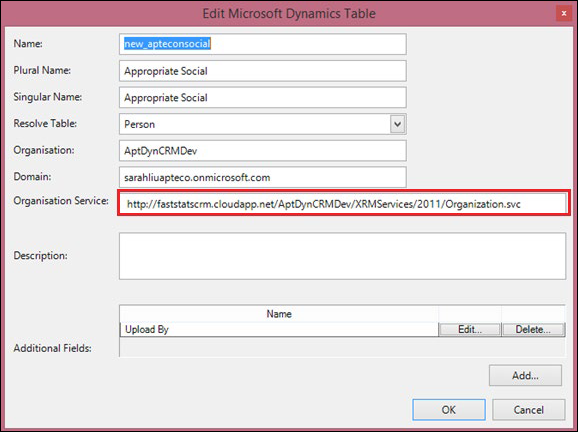
- App Id:
-
If you want to add repeated text into each record of the data you upsert, add Additional Fields by clicking Add"”for example, FS Owner.