Setting up SSO with Azure Active Directory
This article takes an administrator through the process of setting up SSO with Azure Active Directory (AD).
Create an app in the Azure portal
-
Navigate to the Azure Active Directory service.

-
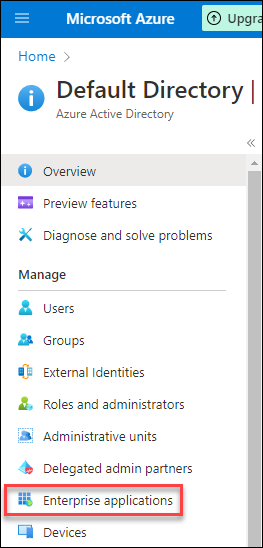
Click Enterprise applications from the Manage menu on the left.
-
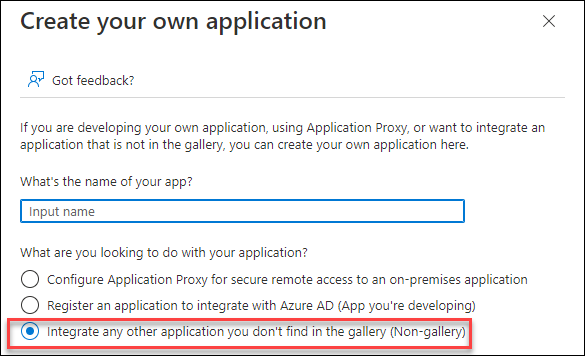
Click New Application, then Create your own application.
-
Give your application a name and select Integrate any other application you don't find in the gallery (Non-gallery). Click Create.
-
Wait for the application to be created.
Configure SAML for the app
-
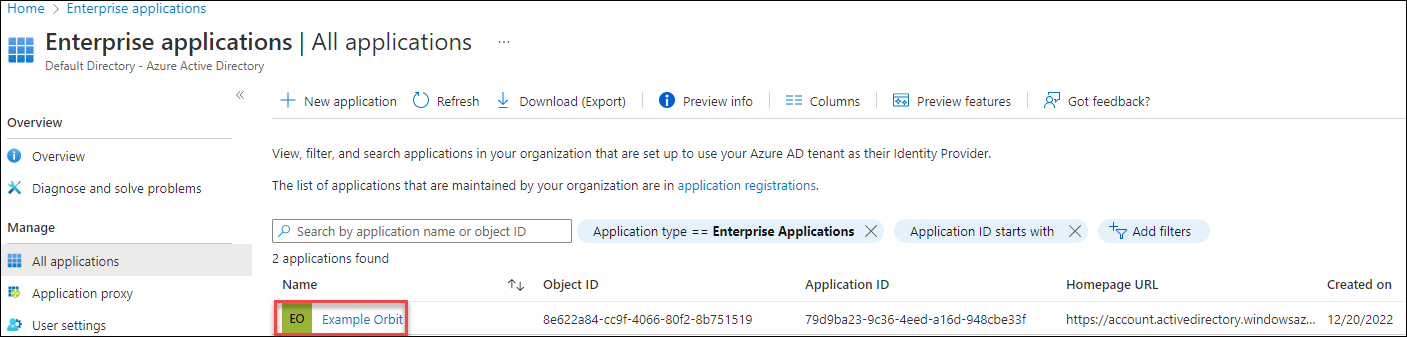
From the list of applications, click on the name of the application you created.
-
Click Set up single sign on, then SAML to open the Set up Single Sign-On with SAML page.
-
Edit the Basic SAML Configuration with the following values (substitute your actual server address for the placeholder):
Configuration item Value Identifier (Entity ID) https://AptecoLoginAPI/Reply URL (Assertion Consumer Service URL) https://[your-server]/OrbitAPI/ExternalLogin/AssertionConsumerService/Sign on URL https://[your-server]/OrbitAPI/ExternalLogin/AssertionConsumerService/Relay State (Optional) https://[your-server]/Orbit/external-login/ -
Click Save.
- From section 3 SAML Certificates, download the Certificate (Base64). You may choose to name it
Azure.cer. -
From section 4 Set up (app), copy the:
- Login URL:
https://login.microsoftonline.com/[GUID]/saml2 - Azure AD Identifier:
https://sts.windows.net/[GUID]/
Substitute your actual Azure GUID into these URLs.
- Login URL:
Configure the Orbit Login Service
See Orbit login service to install and configure the Login Service first.
-
Move the downloaded certificate to the certificates folder:
-
Edit the Orbit Login Service configuration file with the following JSON:
JSON{ "Serilog": { "MinimumLevel": { "Default": "Debug", "Override": { "Microsoft": "Debug", "System": "Debug", "ComponentSpace.Saml2": "Debug" } }, "WriteTo": [ { "Name": "Trace" }, { "Name": "RollingFile", "Args": { "pathFormat": "C:\\temp\\Orbit\\Logs\\OrbitLogin-{Date}.txt" } } ], "Enrich": ["FromLogContext", "WithMachineName", "WithThreadId"] }, "Kestrel": { "Endpoints": { "Http": { "Url": "http://localhost:5005" } } }, "AllowedHosts": "*", "SAML": { "$schema": "https://www.componentspace.com/schemas/saml-config-schema-v1.0.json", "Configurations": [ { "LocalServiceProviderConfiguration": { "Name": "https://AptecoLoginApi/", "Description": "Apteco Orbit Login API", "AssertionConsumerServiceUrl": "https://example.com/OrbitAPI/ExternalLogin/AssertionConsumerService", "LocalCertificates": [ { "FileName": "certificates/sp.pfx", "Password": "password" } ] }, "PartnerIdentityProviderConfigurations": [ { "Name": "https://sts.windows.net/<GUID>/", "Description": "Azure", "SignAuthnRequest": true, "SingleSignOnServiceUrl": "https://login.microsoftonline.com/<GUID>/saml2", "PartnerCertificates": [ { "FileName": "certificates/Azure.cer" } ] } ] } ] }, "PartnerName": "https://sts.windows.net/<GUID>/", "JWT": { "Key": "VerySecretSecurityJWTKey", "Issuer": "https://AptecoLoginApi/" }, "AllowedReturnUrlOrigins": "https://example.com/" }Substitute
<GUID>with your actual Azure GUID. The following parameters are unique to your Azure instance:Parameter Azure value SingleSignOnServiceUrlLogin URL from Azure PartnerCertificates.FileNameFilename of the certificate, e.g. certificates/Azure.cerAllowedReturnUrlOriginsBase URL of the website hosting Orbit
Add users to the Azure application
Add users to the Azure application using the email address associated with the Apteco system.
-
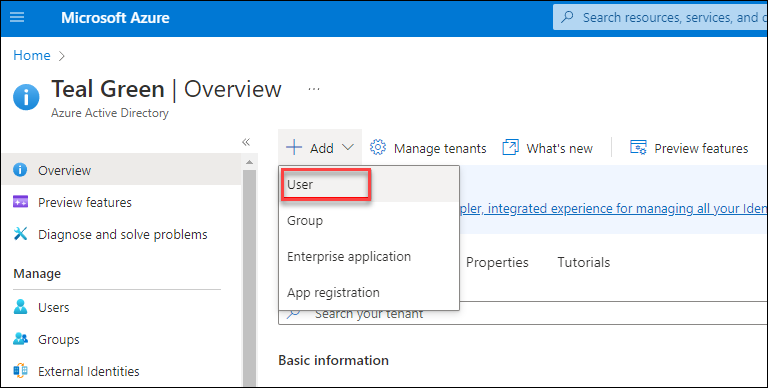
In Azure AD, click +Add > User.
-
Choose Create user or Invite user, and enter the user's details including email address. Invited users receive an email from
invites@microsoft.comwith a link to connect with the new application.
Assign users to the app
- From Enterprise applications, choose the application you created.
-
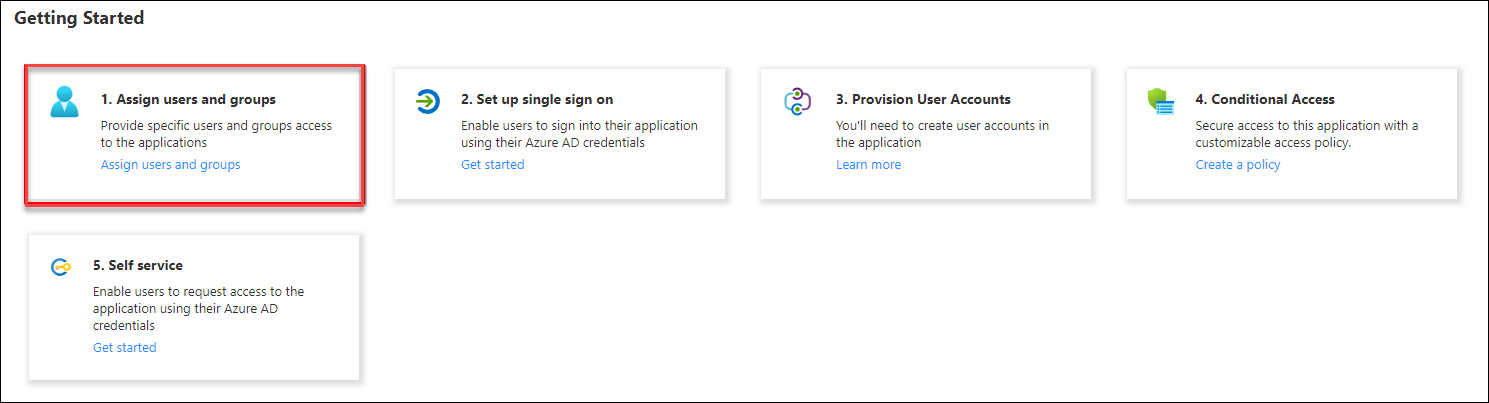
Click Assign users and groups.
-
Click +Add user/group.
-
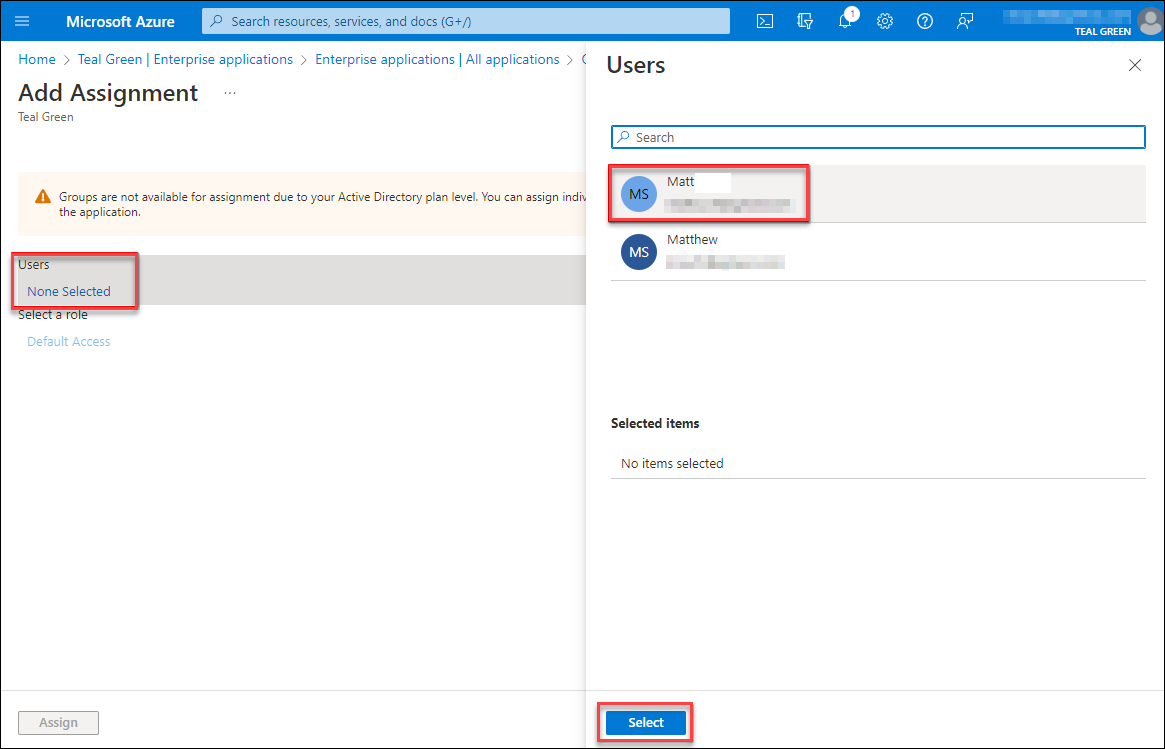
Choose Users—None Selected to open the Users panel, select the user to add, then click Select.
-
Click Assign.
Troubleshooting
Logging in causes a "no dataview" error
When logging in, Orbit displays the following error:
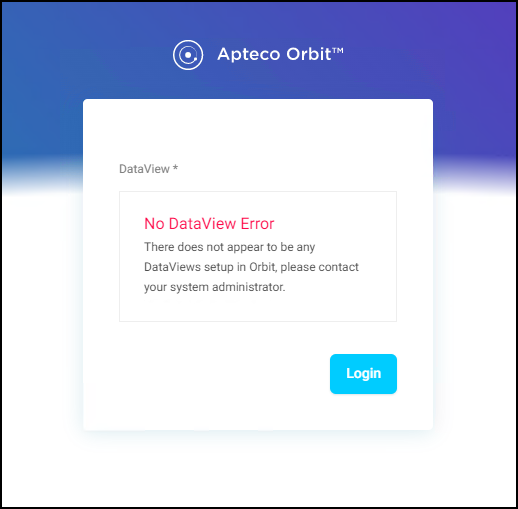
This is caused by Azure passing User.userprincipalname rather than the user's email address.
- Log in to portal.azure.com.
- Click Azure Active Directory > Enterprise Applications > Your Application.
- Click Set up single sign on.
-
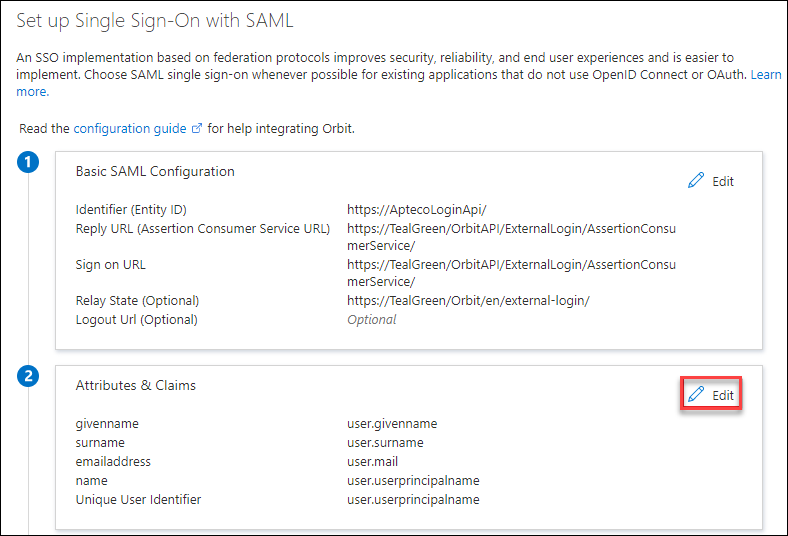
In Attributes & Claims, click Edit.
-
Click on the default claim name (
user.userprincipalname) to edit it.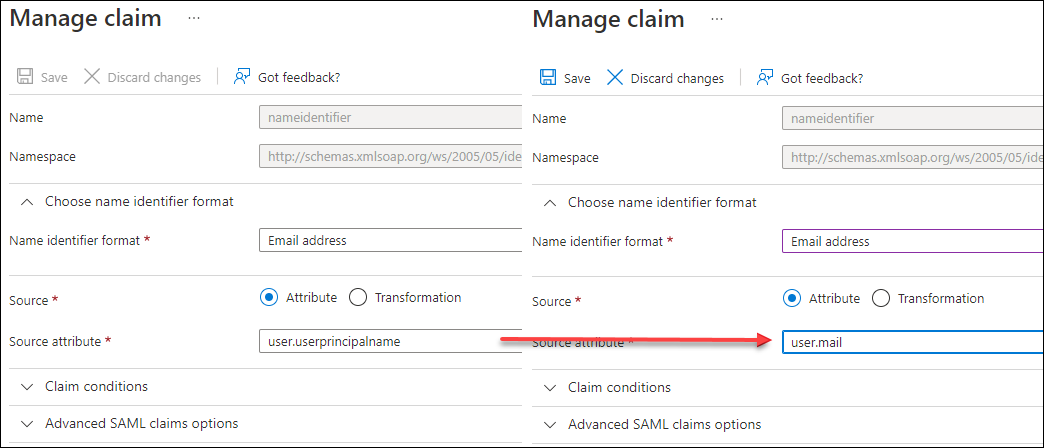
-
Change Source Attribute to
user.mailand click Save.
When the user refreshes their browser, they will be able to sign in.